It’s an inevitable moment in the smartphone-owning cycle: the point at which a newer, shinier model comes along and your trusty old device is no longer needed.
Maybe your company bought you a new Android phone. Maybe your old one was getting too slow. Or maybe you just love electronics and couldn’t resist the lure of whatever eye-catching new Android gizmo your favorite manufacturer started selling.
Whatever the case, it’s common nowadays to find yourself with an extra phone. And while there are plenty of practical uses for an old Android device, there’s also a time when the best choice is to sell, donate, or otherwise pass it along.
Before you do, though, you’ll want to be sure you’ve securely erased the device and removed any traces of your past — because the last thing you’d want is for your phone’s new owner to resurface your personal or corporate data. (You’ll also want to make sure you’ve got all that data ready to migrate over to your new phone, of course. But that’s another story.)
Follow the three steps below, and you can let your old Android amigo move onto its next role without worry.
1. Remove your SIM card and any storage cards
First things first: Before you bid farewell to your old Android companion, you’ll want to confirm that any physical SIM card or external memory cards are removed from the device.
Not many devices still sport SD card slots these days — and more and more phones are now turning to eSIM setups, without any physical cards present — so don’t fret if you don’t find either item.
But it’s well worth your while to look. Both cards can be tied to your identity and filled with private data, and there’s no reason to keep either of ’em in a device that’s exiting your possession.
2. Perform a factory reset to fully erase your device
Now that any physical additions are disconnected, it’s time to turn to your virtual possessions and all the data and account connections within your phone.
This is the actual erasing part of the process: Head into your phone’s settings and look for an option labeled “Reset” or “Reset options.” In the core Google Android software, this’ll typically be within the System section. On Samsung devices, it’ll be within an area called General Management. If you’re using any other type of Android device and can’t find it, try simply searching your system settings for the word reset.
However you get there, find and select the option within that area to erase all data or perform a full factory reset. If you’re presented with any other options to include certain types of data or accounts, be sure everything is selected.
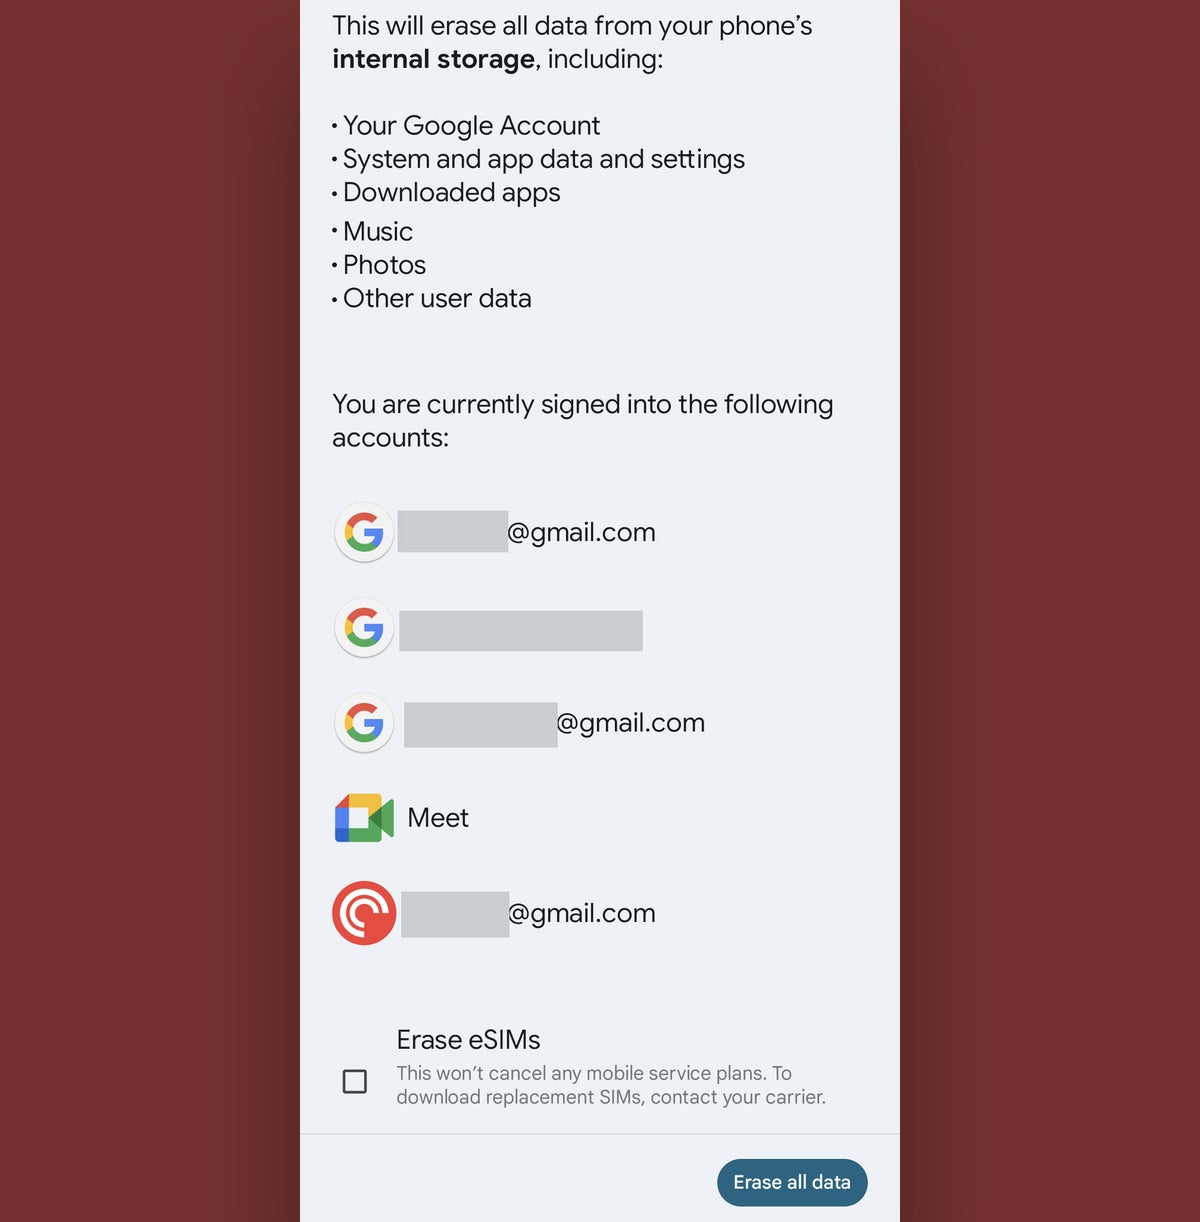
The system will likely give you a confirmation screen or two and then ask you to input your PIN, pattern, or password for protection. If you were using an eSIM, it may also have a checkbox to erase the eSIM from the phone. You’ll absolutely want to do that.
 JR Raphael / IDG
Confirm everything’s correct, make sure every box is checked, then reset, reset, reset.
All that’s left is to hit the button to move forward, then sit back and wait while Android does its work.
3. Remove any remaining account associations
Last but not least, take a moment to manually remove the phone from your Google account and any other accounts that might be associated with it. This isn’t strictly required as part of your Android erasing work, but it’s a good bit of final housekeeping to perform. Improbable as it may be for any practical security threat to result from these issues, there’s no reason to leave even the teensiest window crack open when it comes to your personal and/or corporate data.
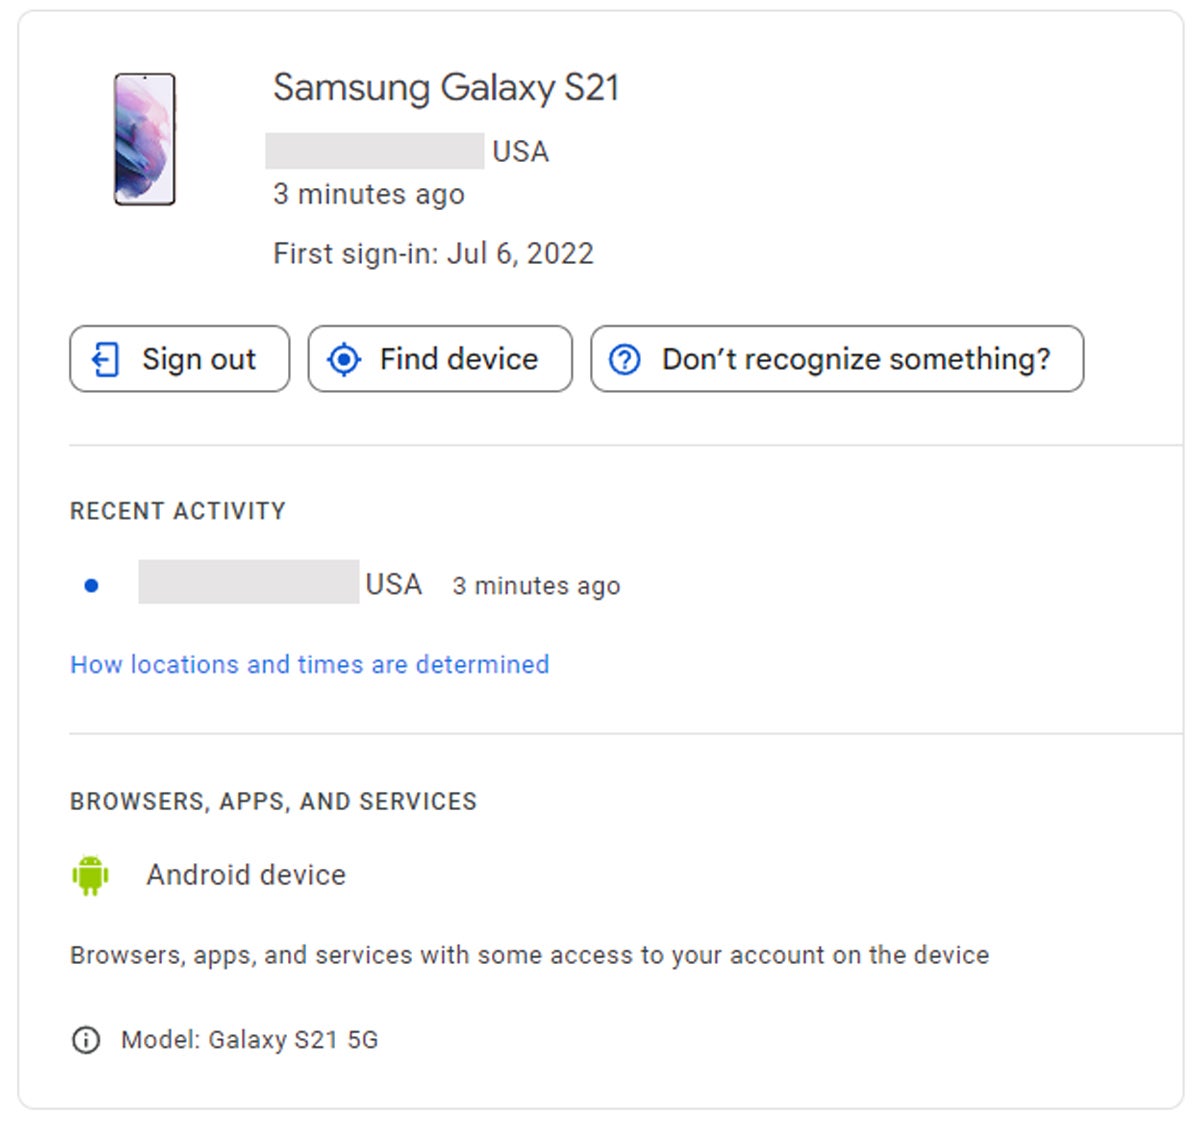
For Google, visit the Your Devices section of the web-based account manager. Find your phone in the list, click it, and then click the “Sign out” button that appears. That’ll ensure your Google account has no lingering connection to the phone.
 JR Raphael / IDG
Severing the connection between a phone and your accounts is a smart final step to take.
Think through any other services that might have similar options — Android password managers like 1Password, for instance, or Android security apps like Authy — and sign into their respective websites to sever any remaining connections.
And with that, you’re all set: Your Android phone is securely erased and ready to move on to its new life. Nicely done!
This article was originally published in December 2017 and most recently updated in December 2023.
Copyright © 2023 IDG Communications, Inc.
This story originally appeared on Computerworld

