When you think about your smartphone, apps and interfaces are probably the first things that come to mind. Beneath all that surface-level stuff, though, our modern mobile devices are filled with files — folders upon folders of ’em! — just like the clunky ol’ computers we’ve relied upon for ages.
We may not come face to face with our phones’ file systems too often, but it’s valuable to know they’re there — and to know how they can work for us when the need arises. After all, your Android device is a productivity powerhouse. It can juggle everything from PDFs and PSDs to presentations and podcasts. It can even act as a portable hard drive and house any sort of important files you might need in your pocket (and not just on some far-away cloud). Your mobile device can carry an awful lot of data, and there may come a time when you want to dig in and deal directly with it.
Here’s everything you need to know to get under the hood and tap into your phone’s file managing powers.
Managing files on your Android phone
You might not realize it at a glance, but Android actually allows you to access a device’s entire file system — even from the device itself.
The operating system has had its own native file manager since 2015’s Android 6.0 release, too, and what started out as an experimental-seeming effort has evolved into a robust and capable tool for all types of data management.
Google’s excellent Files app comes preinstalled on Pixel phones and certain other Android devices. And if you’re using a phone made by Samsung or another non-Google manufacturer that didn’t include the app on your device by default, you can download it for free from the Play Store and use it in place of whatever less-fully-featured alternative your phone’s creator baked into its software.
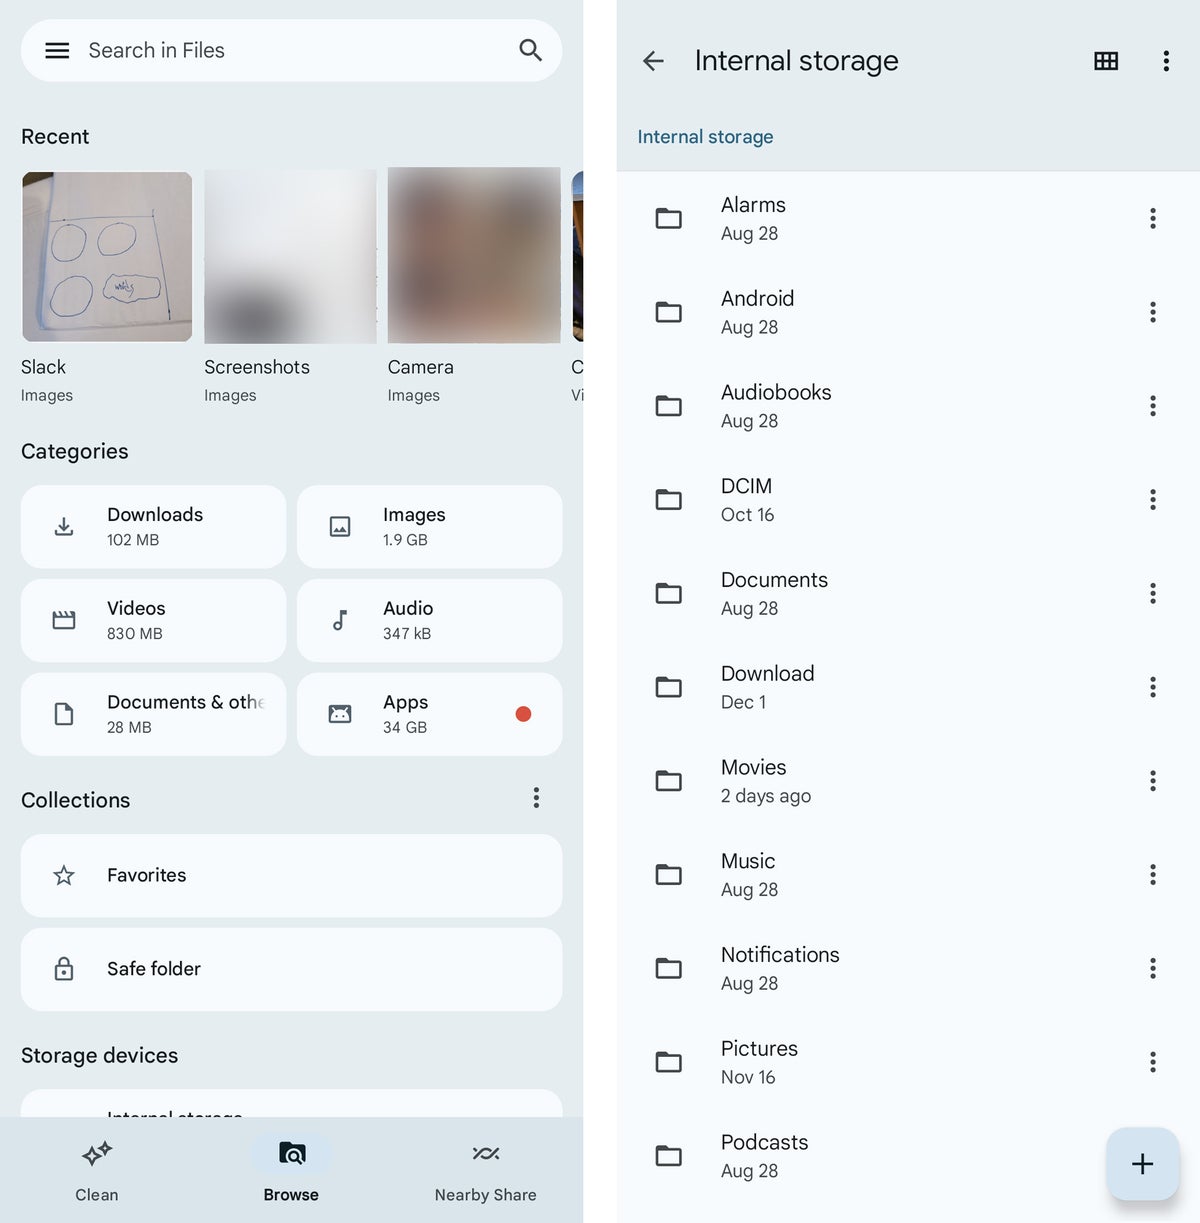
When you first open Google’s Files app, you’ll find yourself staring at its Browse tab — which shows you your most recent files at the top followed by a breakdown of different categories like downloads, documents, and images.
Beneath that, you’ll find a “Collections” section that gives you an easy way to open any important files that you mark as favorites, as well as a way to stow more sensitive files in a special “safe folder” that requires extra authentication to access.
And finally, beneath that, you’ll see an “Internal storage” option that lets you browse your device’s local storage in a traditional file-tree structure to find anything you need.
 JR Raphael / IDG
Google’s Android Files app lets you browse through files in a variety of ways, including via a traditional folder-by-folder view.
Perhaps most important, though, is the search bar at the top of the Files app — which lets you easily find anything on your phone, no matter where it might be hiding. Google’s in the midst of upgrading that function to let it search for text within images, documents, and PDFs, too, which will make it even more useful.
And finally, don’t overlook the Files app’s Clean tab. It’s the fastest and simplest way to free up space on your phone — by following Google’s specific one-tap recommendations for eliminating specific sorts of storage-consuming, likely-not-needed files.
If you need even more advanced on-device file management functions, meanwhile — for instance, dealing with different archive formats or performing batch operations on locally stored files — a third-party file manager can fill in those gaps. You can find my latest recommendations in my separate roundup of the best Android file manager apps.
Supplementing your phone’s local storage
One little-known feature of Android is its ability to connect with external storage devices like USB memory sticks and even larger-capacity portable hard drives. A phone just has to support something known as USB On-The-Go, or USB OTG, in order for the connection to work.
A fair number of devices, including Google’s Pixel phones and many Samsung Galaxy products, offer such support. If you aren’t sure if your phone does, your best bet is to Google its name along with “USB OTG”; odds are, you’ll find the answer fairly quickly.
Provided your device supports USB OTG, all you need is a USB-A to USB-C adapter like this one made by Amazon. Use the adapter to plug the external drive into your phone, then look for a notification confirming the drive is connected.
Tap the “Explore” option within the notification, and that’s it: You can now browse and access all the files on your external drive.
 JR Raphael / IDG
Look for the notification that pops up when an external drive is connected, and you’ll be browsing the drive’s contents in no time.
When you’re finished, don’t forget to go back to the notification and tap “Eject” before disconnecting the drive.
Transferring files between your phone and computer
In addition to supporting external hard drives, your Android phone can act as an external hard drive. Just plug your device into any Windows, Mac, or ChromeOS computer, and you can access its entire file system and drag and drop files between it and your desktop with ease.
With a Windows or ChromeOS system, it’s essentially as simple as plug and play. With a Mac, you’ll first need to install a special program on your computer before the connection can be established.
For step-by-step instructions on any of those fronts, click over to my comprehensive Android file transfer guide.
Transferring files wirelessly between devices
Want to transfer files between your Android phone and a computer — or another Android phone, an iPhone, or a tablet of some sort — without the need for wires? No problem.
Your most basic option is to embrace a middleman — specifically, a cloud storage service like Google Drive, Dropbox, or Microsoft OneDrive. Just upload the files to a folder within the respective app on your Android phone, then find the folder within the same app on the receiving device (or vice versa).
You can get more advanced than that, though, and make your life significantly easier as a result — provided you’re transferring between either two Android devices or an Android device and a Windows or ChromeOS computer in the same physical area.
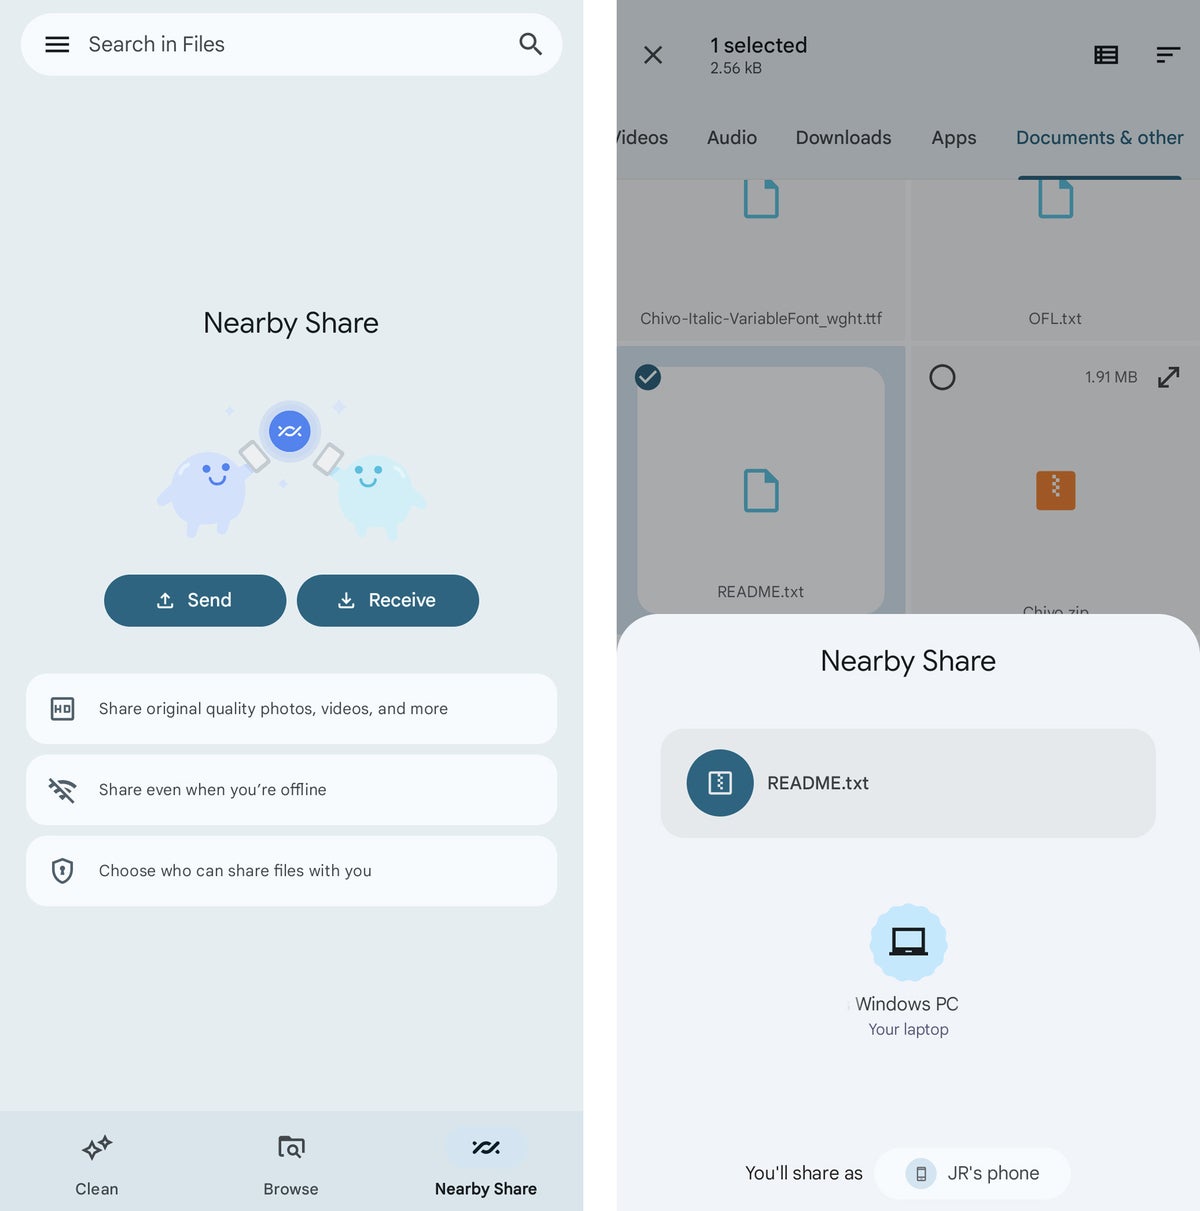
Just open up that Google-made Files app on your phone and tap the Nearby Share tab on its bottom edge. Tap the Send or Receive button and follow the steps to get the process started.
Any other reasonably recent Android device should be ready to send or receive files as part of that same system without any extra software or effort. The same is true for ChromeOS, which has Nearby Share built in at the system level.
With Windows, you’ll need to download and set up the official Google Nearby Share program one time to get the PC ready. From then on out, your wireless sharing should just work.
 JR Raphael / IDG
Google’s Nearby Share system makes it simple to share files wirelessly between your Android phone and any other compatible device — including a Windows computer.
Syncing your Android phone’s storage with a computer
Maybe you like having certain files stored locally on your Android phone, but you also want those files to be backed up and saved on your computer. The best of both worlds, right?
Believe it or not, this is actually quite easy to pull off. Just grab an Android app called AutoSync, which is available for use with Google Drive, Microsoft OneDrive, Dropbox, and Box. It’ll let you create pairings between a local folder on your phone and a cloud-based folder — for free with a single folder pair and files smaller than 10MB or for a one-time $5 payment without any real restrictions.
Install the appropriate computer-side app for whichever service you prefer, make sure it’s set to sync with your computer’s hard drive — and there ya have it: Your Android device’s folder is now effectively part of your PC.
You can even have the folders stay constantly synced in both directions — so if you add or update a file on the computer, the same changes will appear on your phone as well.
That’s a wrap!
Congratulations: You’ve officially earned the title of Android file master. (For real — you can even type it into a document, print it out, and tape it to your desk so everyone knows.)
Next up: Make sure you understand the ins and outs of Android backups. They’re ultimately made up of files, too, after all — and pretty important ones, at that.
This article was originally published in September 2017 and most recently updated in February 2024.
Copyright © 2024 IDG Communications, Inc.
This story originally appeared on Computerworld

