The SwitchBot K10+ is a small, hard-working robot vacuum that promises to support Matter in a future update. But unless you have the SwitchBot Hub 2, it won’t be HomeKit compatible.
SwitchBot, a company most famously known for creating the Smart Switch Button Pusher, offers a range of smart home devices compatible with Matter through the Hub 2. And soon, the K10+ will join them once the next version of Matter is released.
This is exciting because robot vacuums are a great way to help keep your floors clean without the hassle of doing it yourself. With their included sensors, they can intelligently map out your house and then be instructed to clean specific areas and rooms.
For the past week, we’ve tested the K10+ in a fully carpeted house with a kitchen, dining room, living room, and hallway connected to multiple bedrooms. It got the overall job done, but it’ll work better in smaller spaces with wooden or tiled flooring than carpeted family-style homes.
SwitchBot Mini Robot Vacuum K10+ review: Familiar design in a smaller body
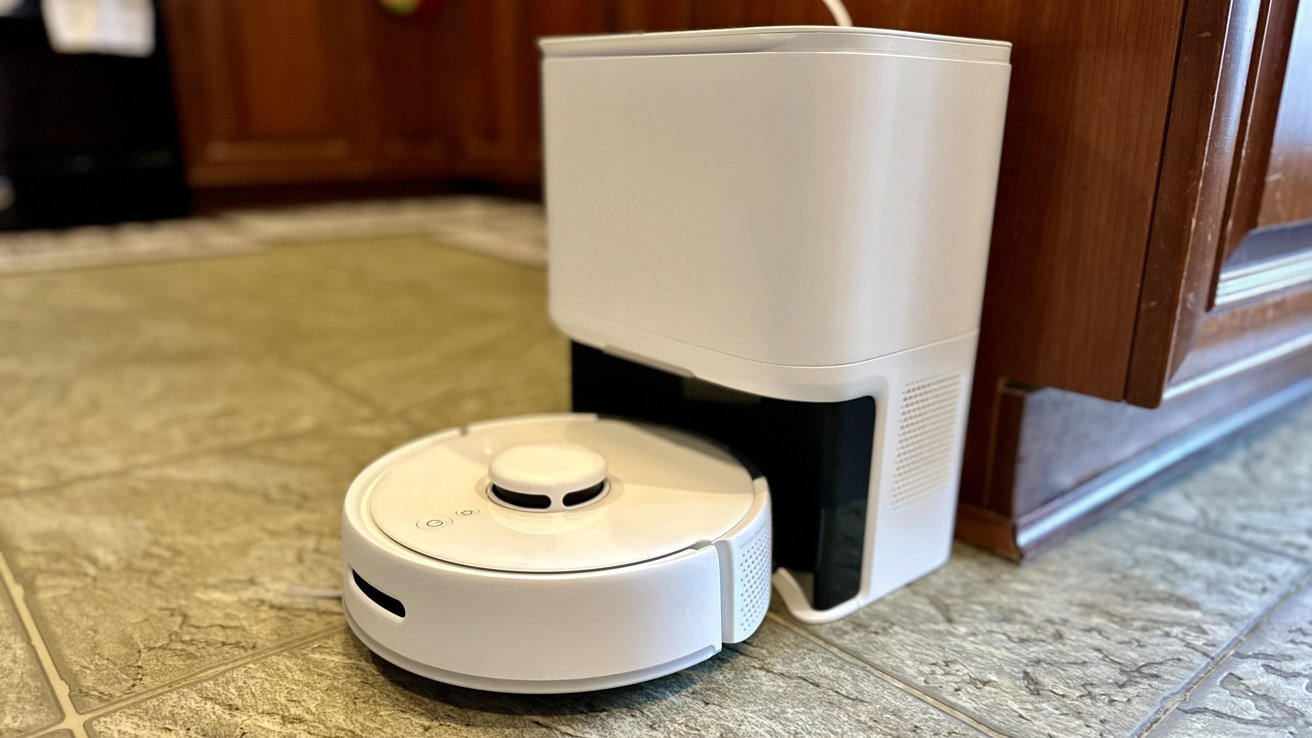
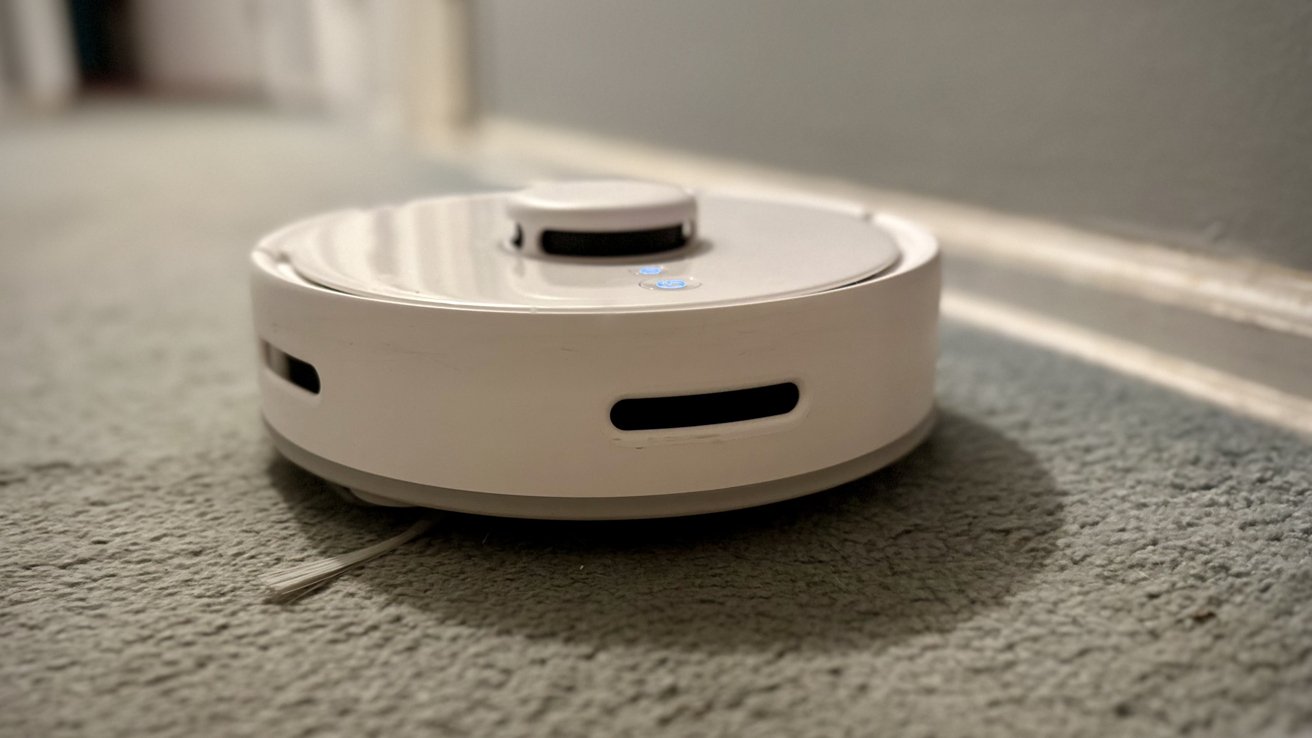
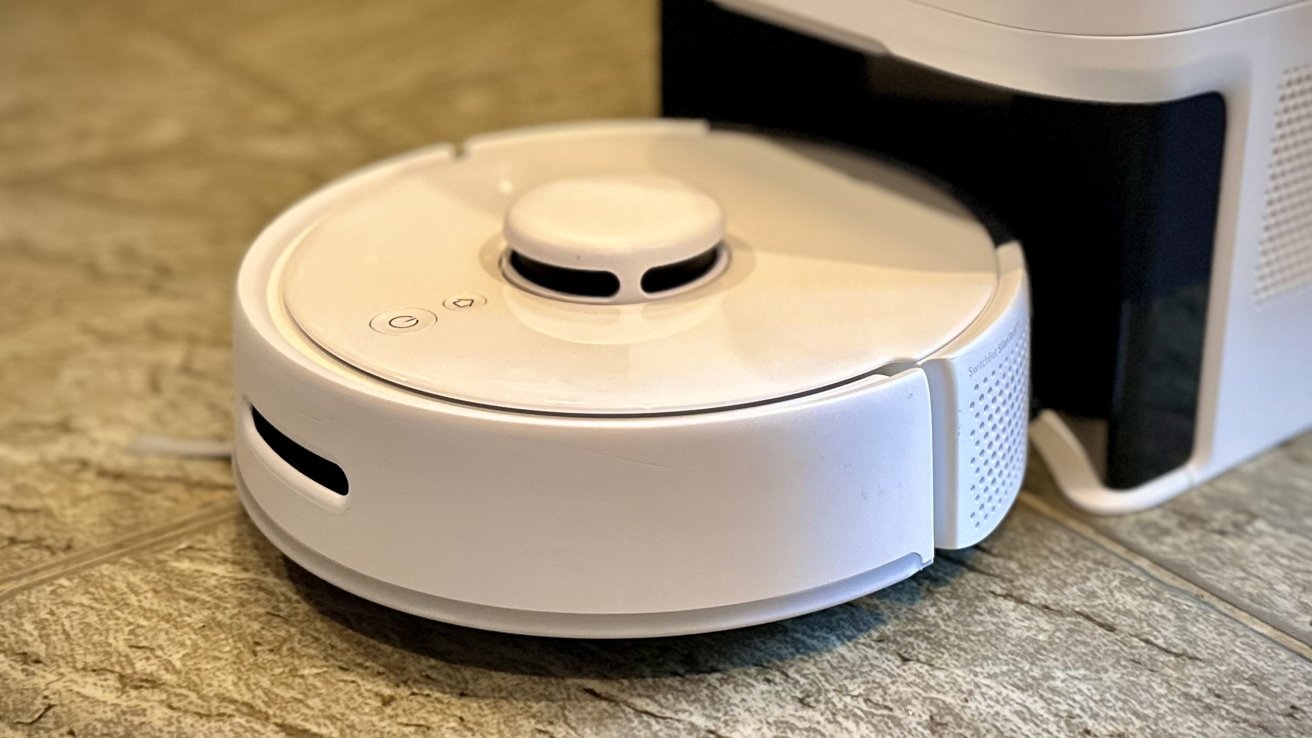
The SwitchBot K10+ sports a design similar to that of other robot vacuums but is built in a more compact form. This is great for apartments and tiny homes that don’t offer much additional storage space.
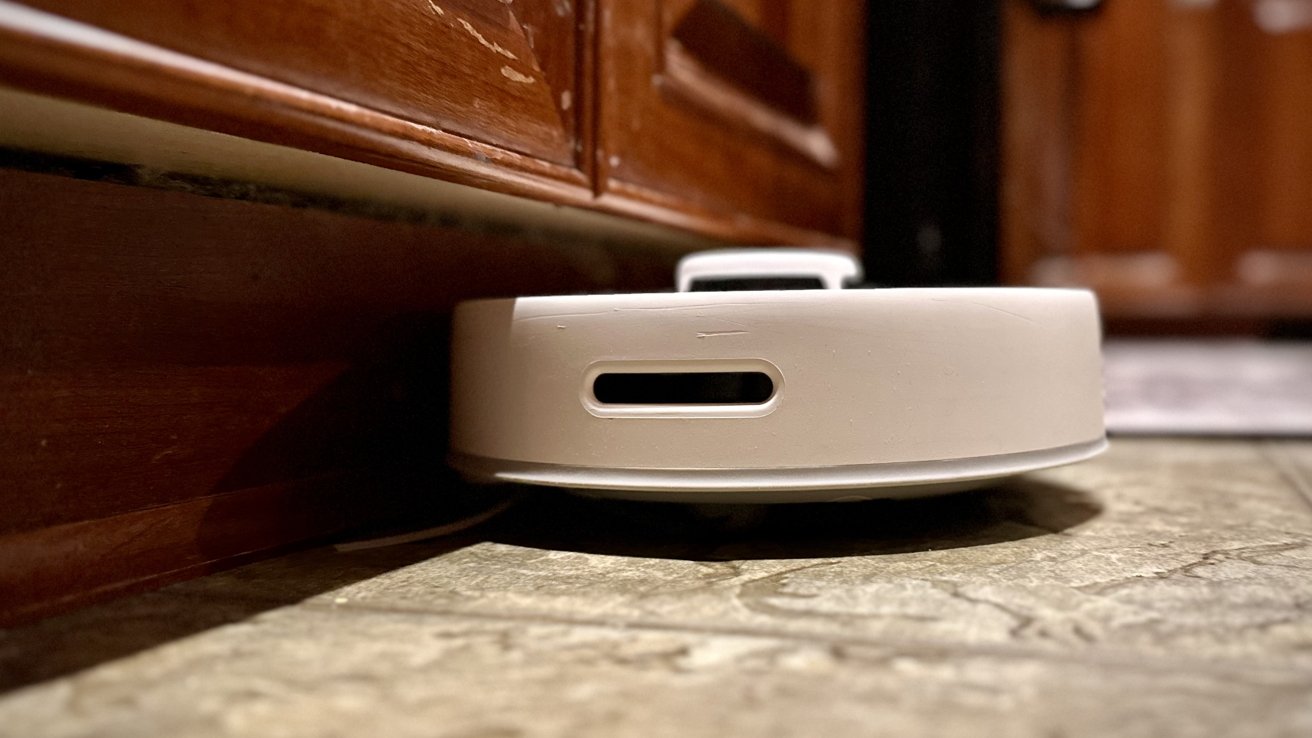
Measuring 9.76 x 9.76 x 3.62 inches and weighing 5.06 pounds, the K10+ is small enough to go under low surfaces and into tough-to-reach spaces. It’s also light enough to effortlessly pick up when changing its location, which is suitable for multilevel homes.
When cleaning our kitchen, it could get under the space between our cabinets and the floor. This would typically be a complex area to clean with our traditional vacuum, but it was no problem for the K10+, which swept every corner underneath.
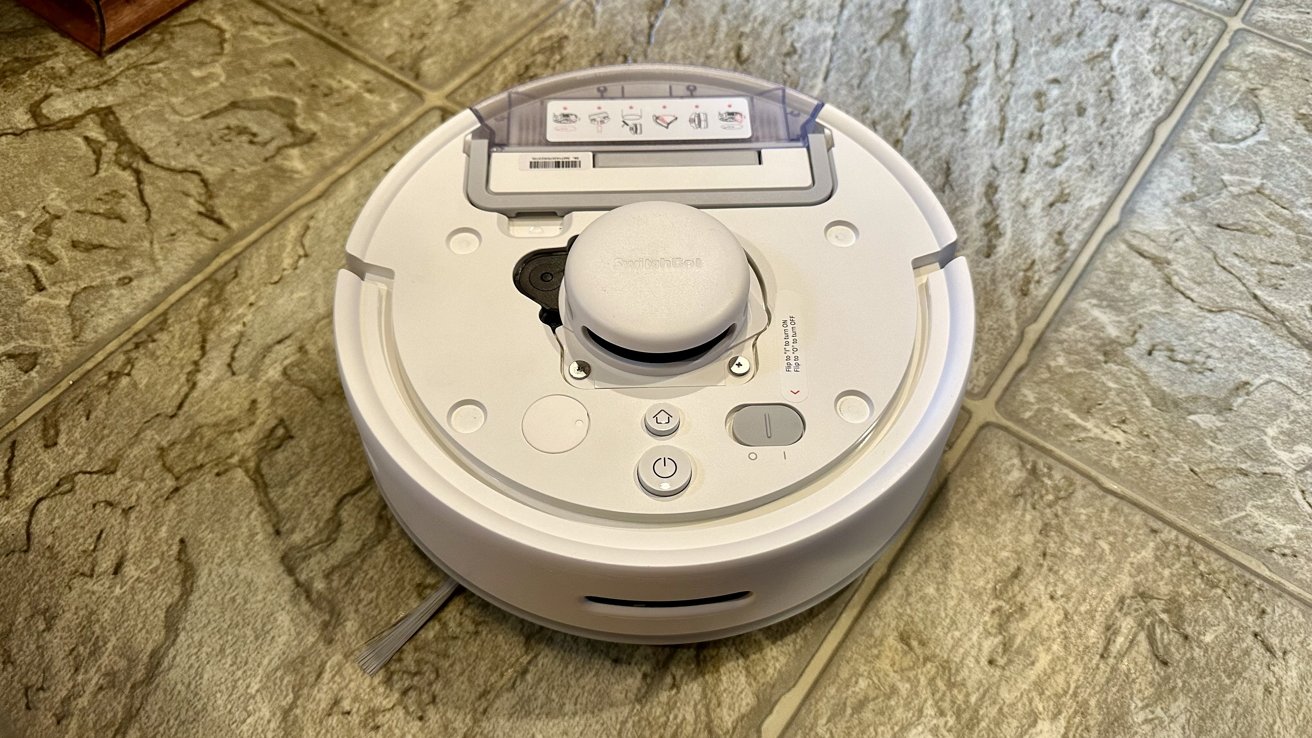
On top is a power button to activate cleaning mode or turn on the device, but another way is by lifting the magnetic faceplate and using the switch underneath. Additionally, there’s a home button to send the vacuum back to its base to charge, but it’ll also do that automatically after finishing a task.
When first pushing the power button, we thought it would only be for turning the vacuum on and off, but we were wrong. Instead, it went into cleaning mode and started vacuuming our whole house.
This may confuse most users since you wouldn’t expect the power symbol to initiate cleaning. It would be beneficial for SwitchBot to incorporate a separate cleaning button so you know what each button dies before pressing it.
The LiDAR sensor in the middle helps map out your house’s floor plan and prevent potential collisions with anything in its path. But if the vacuum does run into something, the bumper across the front will protect it and spring the K10+ back onto its route.
One detail we noticed is how easily scratched the bumper gets after colliding with objects frequently. They are unnoticeable from far away, but you’ll see them when you get up close. They won’t impact the functionality of the robot vacuum but will alter the appearance slightly when seen.
As the K10+ cleaned our house, we continuously heard the bumper clicking when colliding with objects. The constant clicking didn’t annoy us since the robot vacuum does this to get into every corner, so it was expected.
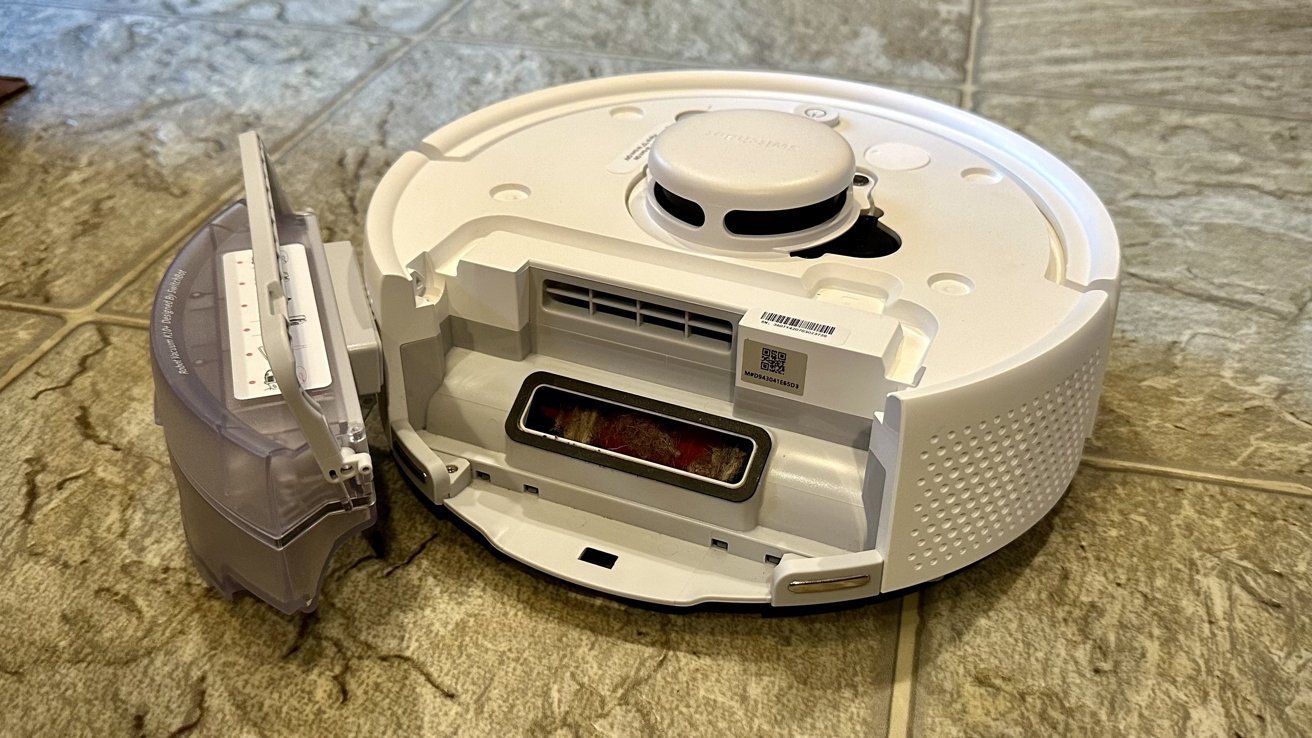
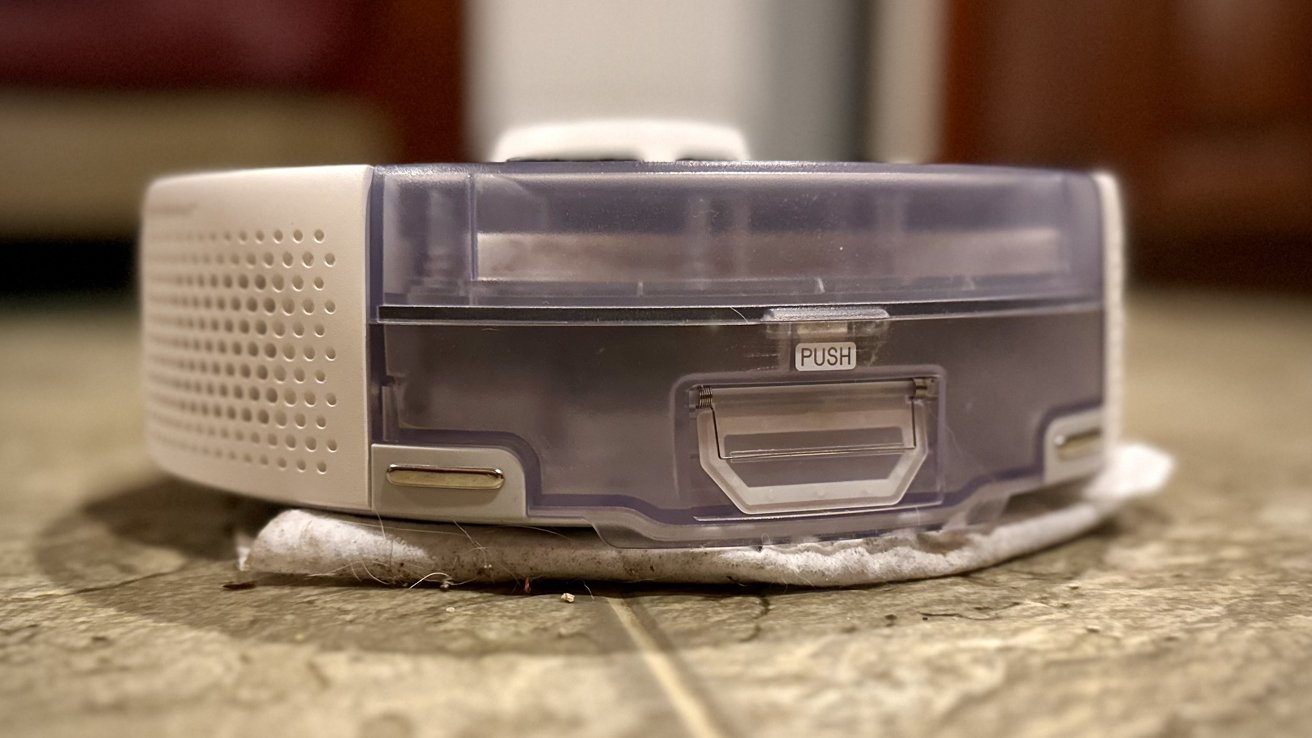
On the back of the K10+ are inserts to attach the mopping pad plate and the detachable bin that houses everything the vacuum picks up. The two charging connectors on opposite sides of the bin connect the vacuum to its base for charging.
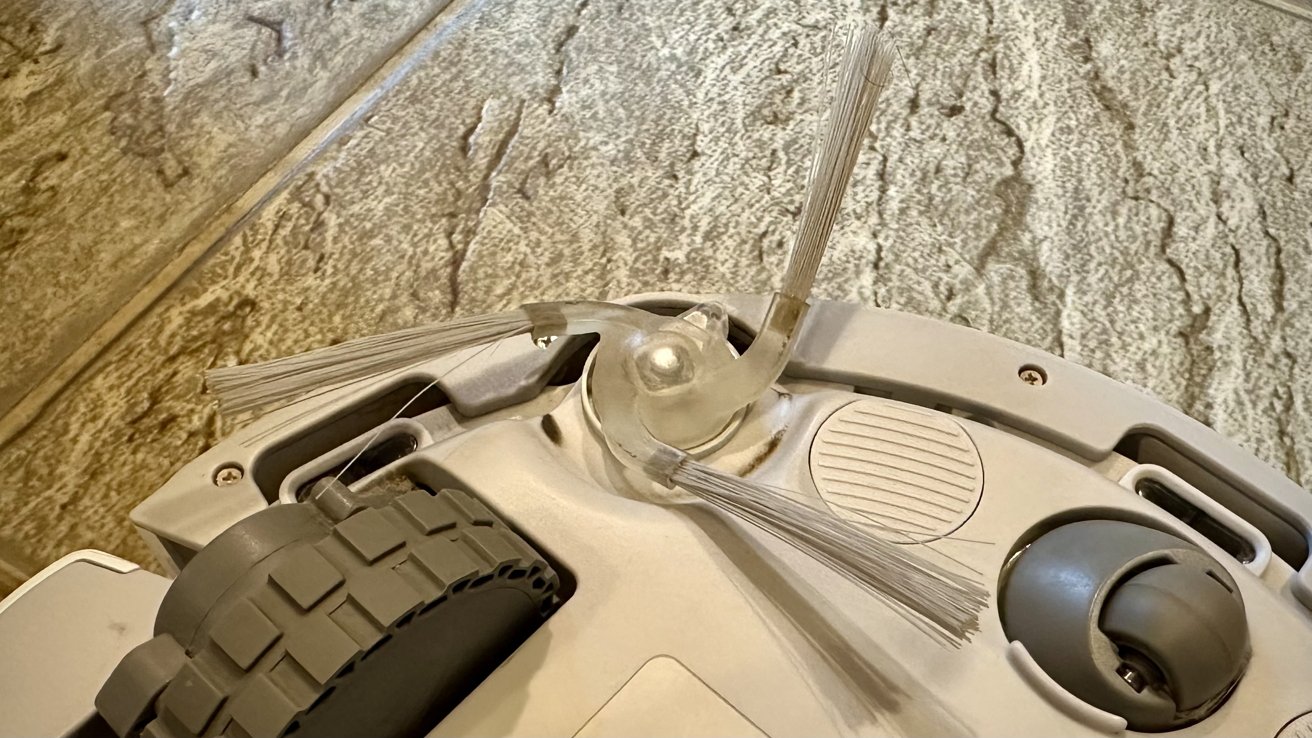
Flipping over the K10+ will reveal the brush frame, the multi-surface brush, and a detachable edge-sweeping brush. You’ll need to manually put the edge-sweeping brush on since it won’t be attached when taking the vacuum out of the box.
SwitchBot Mini Robot Vacuum K10+ review: Edge-sweeping brush that’ll collect debris not reachable by solo-suction
To attach the edge-sweeping brush, you snap it into place, but removing it requires a little force since it becomes securely fastened when putting it on. We never had an instance where we needed to take the brush off, so difficulty removing it wasn’t encountered.
SwitchBot Mini Robot Vacuum K10+ review: The vacuum’s home base
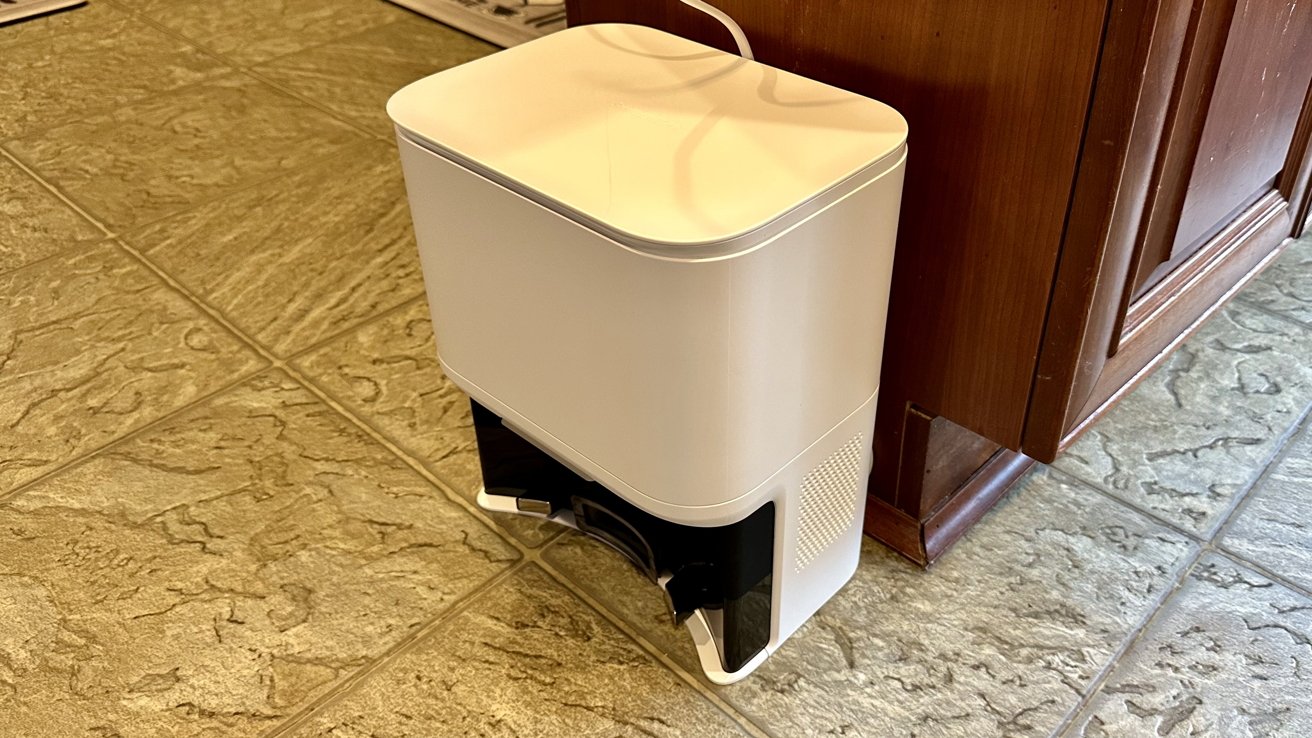
Accompanying the SwitchBot K10+ is the Auto-Empty Station, where the vacuum will charge and automatically empty itself through the Station’s debris evacuation port.
Measuring 10.3 x 8.3 x 12.7 inches, the Station can fit under a table or within a narrow corner. Because of its lengthy power cord, you don’t have to place it close to an outlet, but there’s a built-in cord wrap to bundle unused cable.
When finding a place for the Station, it’s important to remember that the K10+ will be sticking out from it when it’s docked. Be cautious of its surroundings since the K10+ has to be able to access it when coming and going. We initially placed it under our kitchen table in front of a textured rug, and the robot vacuum had no issue accessing or leaving the Station when going over it.
The LED indicator on the front will alert you of different information depending on its color. When it’s white, it means the K10+ is actively charging; when it’s red, it means the canister lid is open, or the dust bag needs to be replaced. Another way to tell if the dust bag needs to be replaced is if the Station doesn’t automatically empty the debris from the vacuum when it docks itself.
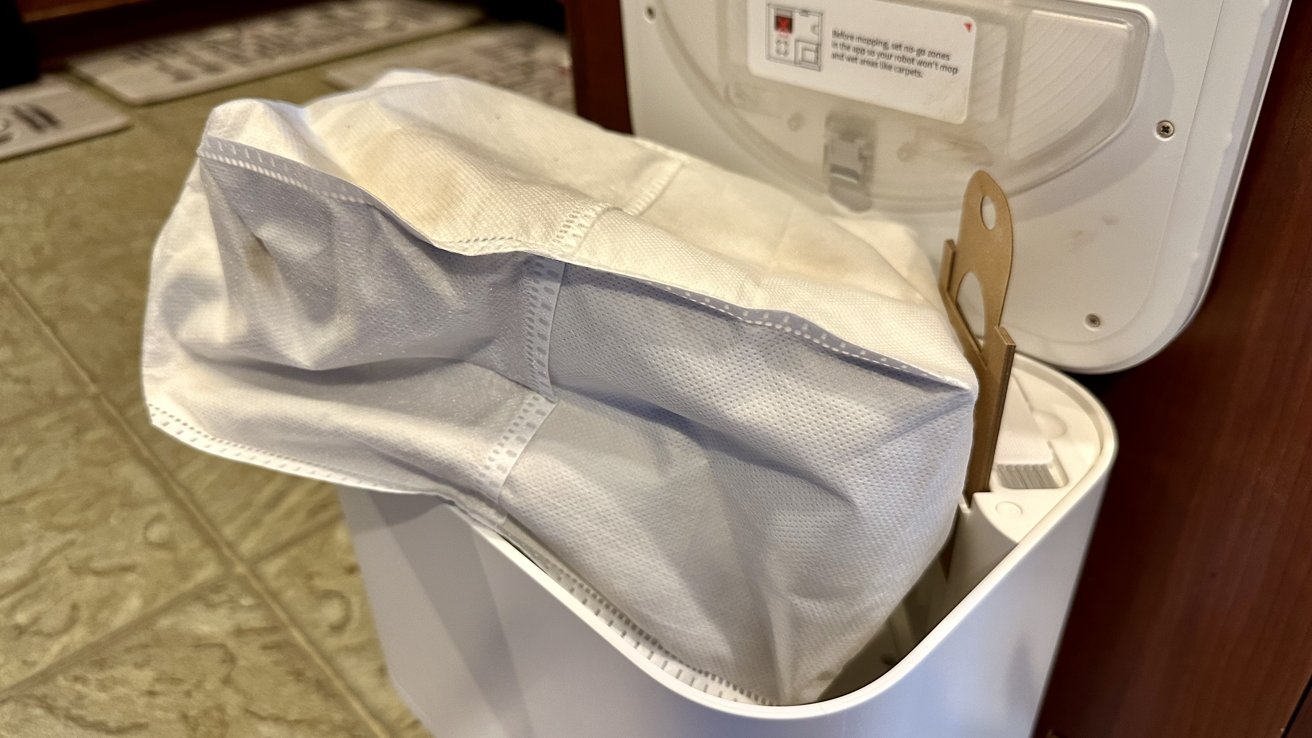
The dust bag can be found inside the top of the Station, and SwitchBot recommends you change it every one to two months. We wish we could see how full the bag was from within the SwitchBot app, but unfortunately, all it told us was how often it should be changed.
SwitchBot Mini Robot Vacuum K10+ review: Dust bag found on top of the Auto-Empty Station that can easily be switched once full
There’s another bag in the box when the time comes to change it, but once it’s used, you must purchase additional ones. A four-pack is available on Amazon for $15.
Changing the bag is easy; all it takes is to remove the existing one by its cardboard insert, discard it, and then insert the new one into the same location.
Although purchasing additional ones is not too expensive, we would’ve preferred a reusable option be included since you must remove the whole bag when replacing them. This would be both cost-efficient and environmentally friendly.
SwitchBot Mini Robot Vacuum K10+ review: Mapping out the layout
Before the SwitchBot K10+ starts recording the layout of your house, you must choose the action it takes once done. You can have the K10+ only map out your home or clean it after it’s done.
For our review, we chose to have the K10+ solely map out our house before cleaning so we could see each step in detail. It also allowed us to ensure each room was divided correctly in the app before it started cleaning.
While mapping, the K10+ will go to various spots within a room, capture the surrounding area by turning 360 degrees, and then move on to its next point. The mapping process is quick, and with the LiDAR sensor, the vacuum doesn’t need to go to every area in a room to capture its layout.
You can watch the process from the SwitchBot app, and as we watched it, we saw the vacuum starting to record another room while still mapping its one-in-progress. This happened when the other room’s door was open, but it didn’t get the whole layout until it went deeper into the room.
But while this did help make the task quicker, the vacuum sometimes recorded a room we didn’t want to be mapped out. Although you can block off these areas in the app, it would be better to delete them entirely, but there’s no way to remove them currently.
As the K10+ is mapping, it won’t simultaneously clean, so unless you initially told it to clean afterward, you must direct it to do so once it’s done recording.
For multi-leveled houses, you must pick up the K10+ and place it on the next level to have it start mapping out its layout.
A built-in cliff sensor under the bumper detects stairs and prevents the vacuum from falling. But even when the sensor was mostly successful, there were times when the K10+ would fall down our stairs, and we had to retrieve it.
When the robot vacuum was initially mapping out our house, we thought the sensor would fully catch notice of our stairs, but it didn’t. This was unusual because it did stop itself from falling when near the stairs before. Luckily, it only fell one step, but it probably would’ve broken if it had gone down the entire flight.
Since this happened more than once, we chose to stand at the top of the stairs to prevent the vacuum from falling when remapping. Once the house was completely mapped out, we programmed the K10+ not to go near the stairs as an extra layer of protection.
It’s a shame the robot vacuum was unreliable around stairs and needed assistance to prevent it from falling. The K10+ is supposed to protect itself to ensure a smooth mapping experience, but manually assisting to avoid accidents decreases the notion.
After your home is mapped out, you’ll see a complete layout within the SwitchBot app, where you can rename, redivide, and merge the scanned rooms. The layout may look confusing initially, but the best way to decipher it is by locating the Station on the map and comparing it to the recorded floor plan.
When we got the final mapping of our house, we saw multiple areas that needed to be redivided and merged. The layout consisted of rooms bleeding into each other and some being divided into two separate locations. Fortunately, fixing these issues wasn’t difficult and only took a minute to complete.
SwitchBot Mini Robot Vacuum K10+ review: Vacuuming the hard to reach areas
Before vacuuming, put away any objects the vacuum could sweep up. If the K10+ gets caught on anything, it’ll pause cleaning until you fix the issue.
While it is understandable to pick up vulnerable items, it would have been more convenient for the K10+ to notice them and stay clear with the LiDAR sensor.
Preparing your room for the robot vacuum minimizes the usefulness of setting it on a schedule to clean automatically. If you forget to pick up an item and the K10+ gets caught on it, the cleaning process will be halted until you intervene. Depending on when you fix the issue, this could result in a longer cleaning time.
When cleaning our house, the K10+ sucked up the cable to our shades and fought with one of our dog’s chewed-up ropes, so be aware of what’s accessible.
Also, before the K10+ vacuums, you should attach the edge-sweeping brush if you haven’t already. It’ll help collect additional debris the vacuum won’t be able to reach, and when testing, the vacuum did a better job collecting dirt and dust with it on than off.
The K10+ has a high-performance motor and built-in duct design to allow suction power up to 2,500Pa. Because of this, the vacuum swept up items such as dry cat food when in the kitchen and small chipped pieces of wood when by the fireplace.
As it vacuums, the K10+ will first lap around the room’s perimeter and then start cleaning the inside. As it does this, the vacuum will go in a straight line, turn around, and then proceed to the following line. If something significant is in the way, the K10+ will notice it — but go around it — and continue on its route.
When cleaning, the K10+ made minimal noise, with levels reaching around 48 dB. However, increasing the suction power does make it louder. We set the suction level to MAX — the highest level — and while we could hear it down the hall, we weren’t disturbed by its loudness.
We had the K10+ vacuum our whole house, and although it did an acceptable job, it favored the tiled flooring over the carpeted, which was to be expected. We saw more leftover debris on the carpeted surfaces than in the kitchen, where the flooring is tiled.
We especially saw this in areas throughout the living room where we sprinkled dry cleaning powder before vacuuming. While it picked up cat hair, pieces from our dog’s rope, and dirt from outside, it had trouble sucking up the cleaner in some areas.
This was surprising since the dry cleaning powder could easily be incorporated into the carpet when we rubbed our shoes against it. And for the K10+ not to make a dent in the cleaner’s placement was pitiful since we had it on the most robust suction setting.
The K10+ also had contrary relationships with different depths of carpeting. While the living room had shallow carpeting, the bedrooms were deeper. This resulted in the vacuum not doing as well in the bedroom as in the living room by leaving debris — which was undoubtedly accessible — still lying around.
On the other hand, when navigating the room, the K10+ excelled by moving around and avoiding unrecorded objects that weren’t present during initial mappings. It got under our bed, navigated around chair legs, and easily transferred from different surfaces.
The vacuum also rarely got stuck or lost, but it frequently collided with furniture and walls yet remained unharmed because of the front bumper. If you don’t want it to run into objects as much, enable reduced collisions within the vacuum’s settings, but some areas may be left uncleaned.
When we turned off the reduced collision mode, we noticed the vacuum randomly ramming itself into furniture when cleaning around it. This mainly happened when cleaning around chair legs, and even though the bumper protected it, the impact sound was more significant than when the mode was enabled.
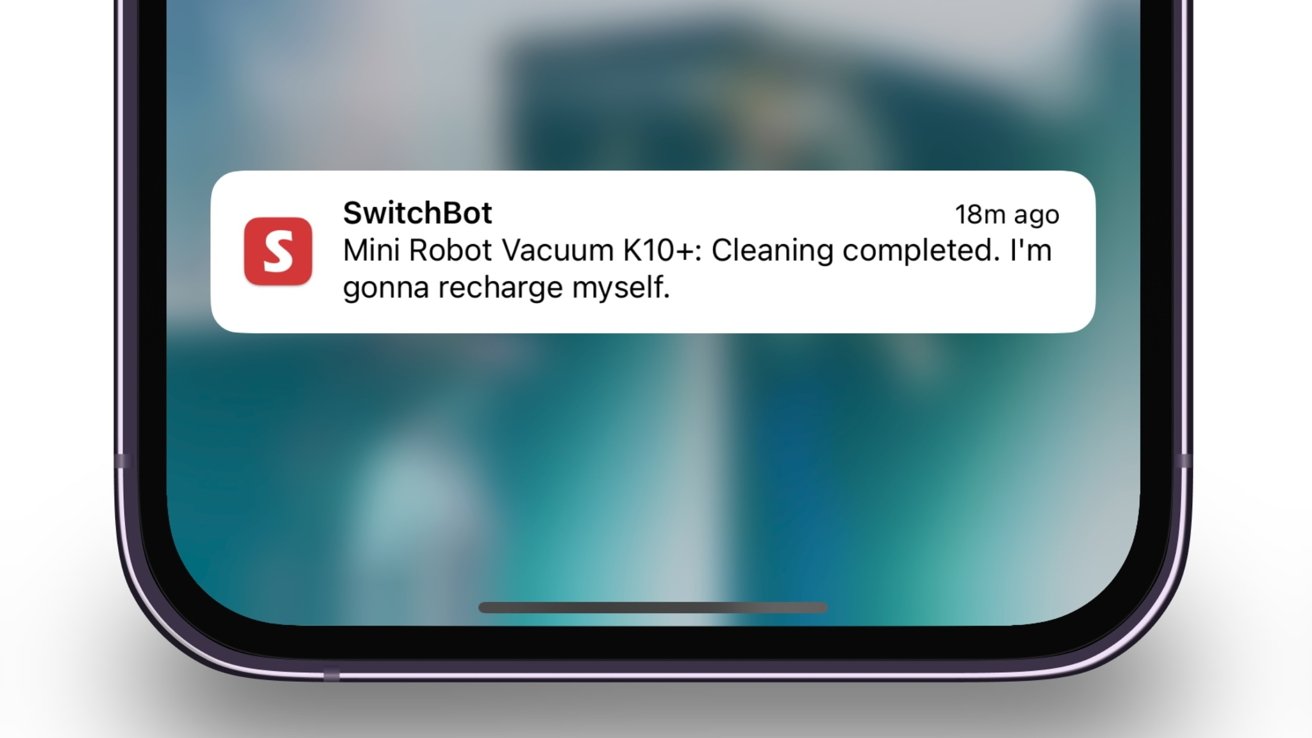
Once the K10+ was done cleaning, it notified us of its completion and returned to the Station to charge and unload what it had collected. When docked, the Station automatically sucked in the debris and then started charging the robot vacuum.
Although the K10+ is not too loud when cleaning, the same cannot be said about the Station when sucking in what was collected. It’s deafening and will startle you if you’re not paying attention, but it only lasts a minute, so it won’t be active for too long.
While the Station will suck in most of the debris, you’ll need to untangle anything caught within the multi-surface brush underneath the vacuum. It’s mostly straightforward, with the brush effortlessly popping out, but we did have to use nail clippers to chop up any tangles we had issues with.
One useful feature was the messages the K10+ would say before and after cleaning. These messages ranged from the vacuum saying it’s going back to charge to saying it “loves to clean” before starting to vacuum. These helped us stay informed of its actions without looking in the app.
However, while the announcements were informational, the K10+ would speak faster and in a higher-pitched voice when saying it would recharge or unload. This was very different from the normal-paced statement it made when going to clean.
We have looked into its voice package settings and have had no luck finding a switch — or explanation — to fix this issue.
SwitchBot Mini Robot Vacuum K10+ review: Putting it to the test
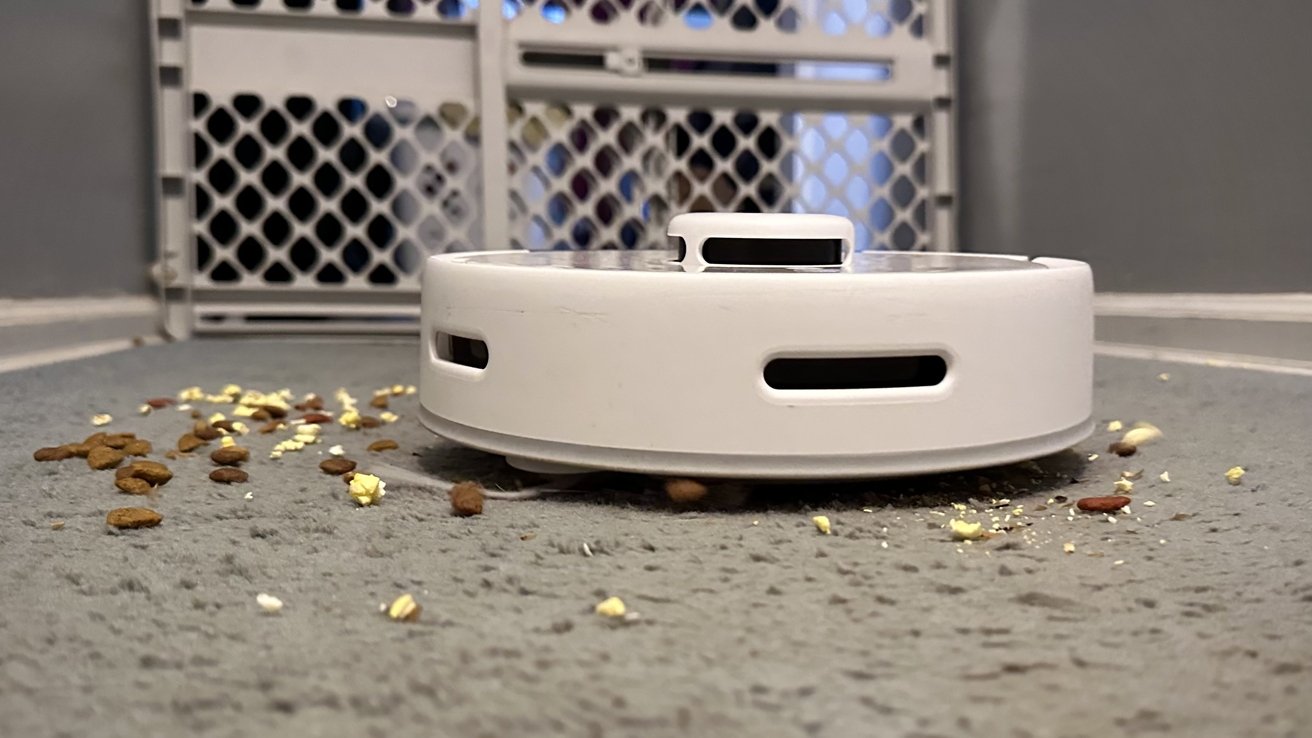
While the K10+ did a fair job of cleaning around our house, we wanted to put it to the test and see if it lives up to how it’s advertised. For our test, we spread out a mixture of movie popcorn, dry cat food, and dry dog food within a controlled area in the hallway. We chose these objects to simulate various weights and sizes to see which the K10+ could and couldn’t pick up.
The K10+ started strong by clearing a direct path through the mixture by repeating the same strategy it had done before, going around the perimeter and then cleaning the inside.
SwitchBot Mini Robot Vacuum K10+ review: K10+ actively picking up the mess from pre-made mess to test suction power
We were impressed by how it could easily pick up the mixture of scattered objects, proving that the suction could suck up items of various weights. But although it started strong, the vacuum reached its limit pretty quickly.
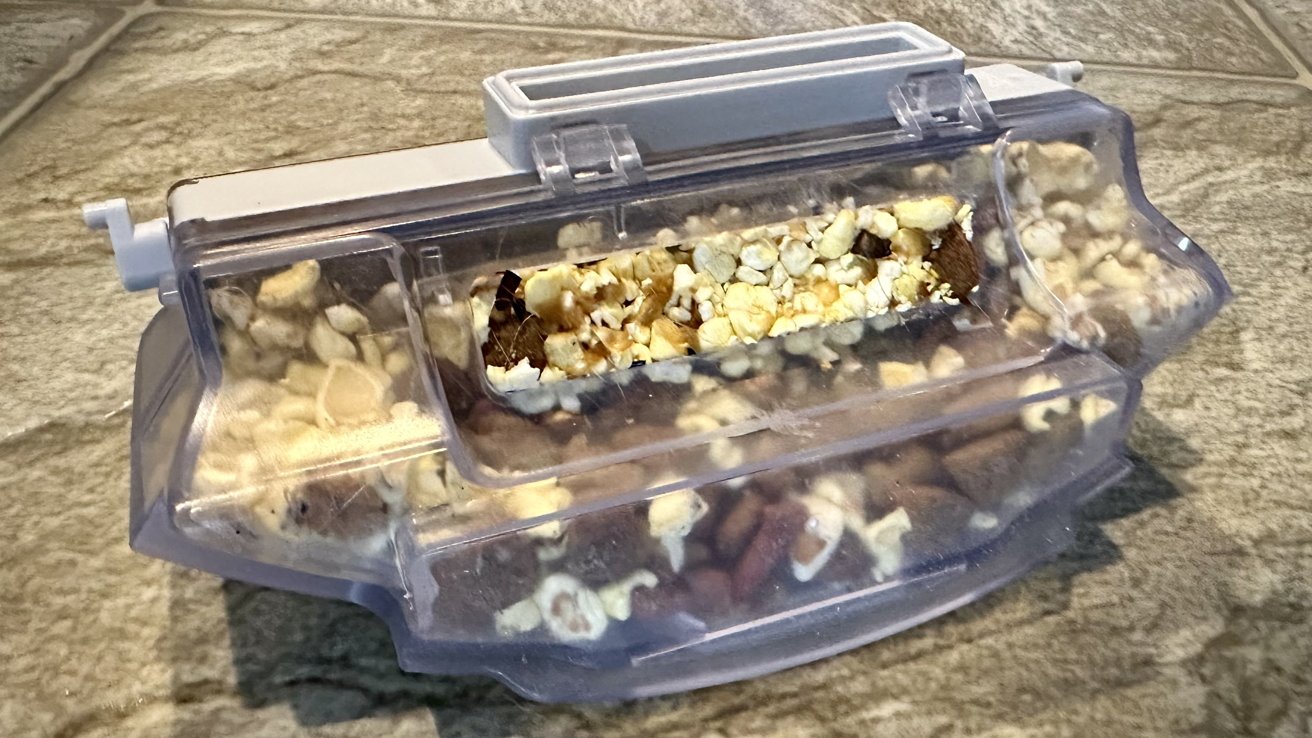
After picking up half of the mess, the robot vacuum’s dust bin became full, and the K10+ stopped collecting additional debris. Yet, it continued on its route but would only roll over — not pick up — the mixture.
As the K10+ moved around on its route, its multi-surface brush got stuck, and the cleaning task was paused. To fix this, we moved it off the mess to an already clean area, and from there, the robot chugged forward.
After it went around the whole area — yet still containing dirty sections — the K10+ announced it was done and was returning to recharge. Once it docked at its station, it automatically unloaded its dustbin, but it was not completely emptied due to the size of what was collected.
By removing the magnetic plate and lifting the handle, we checked the dustbin and saw it was still full after suction. This resulted in us having to manually remove and empty the bin into the trash.
While this task was simple, we were surprised we had to do it since we believed the Station’s suction power was mighty.
Ultimately, we were disappointed in the cleaning results because half of the mess was still there even though the K10+ determined it was done cleaning. It would’ve been efficient for the vacuum to notice its bin was full, empty itself at its base, and then return to finish its task. Yet, it continued on its route, collected nothing, and got stuck.
Additionally, while returning to the Station, it would leak and leave bits of what had been collected on its route. This caused an expansion of the initial mess into already clean areas, doubling the work that would have to be done later.
Overall, the K10+ can pick up various items of different sizes and weights, but the more significant they are, the faster its bin will fill up, lessening its cleaning efficiency.
SwitchBot Mini Robot Vacuum K10+ review: Not the best mopping experience
Like vacuuming, the K10+ will also intelligently mop floors with its included wipes, but before you can start cleaning with it, you must connect the mopping pad plate.
You can find the mopping pad plate inside the Station’s lid, and once it’s attached to the K10+, the robot vacuum will automatically switch to Mopping Mode. It’ll also confirm the switch by verbally saying it.
Putting on the mopping pads was simple; you put them between the clips and attach them to the adhesive side panels. It may take a try or two to get the process down, but it’s smooth sailing once you do.
The robot vacuum will perform the same route as when vacuuming. This includes going around the perimeter and then cleaning the inside of it. However, it won’t simultaneously vacuum when mopping since you must remove the multi-surface brush to attach the mopping pad plate.
When mopping, the robot vacuum will not detect if it’s on a carpet, so picking up any mats in the room before starting is a good idea. Precisely dividing the rooms or placing no-go zones within the app will also help ensure it won’t go on carpeted surfaces.
The K10+ picked up debris in our kitchen, leaving a damp trail from the cleaning solution on the wipe. But as it went on, we heard continuous scraping and realized the wipe had detached from the plate clamps and bunched up underneath the middle of the vacuum. Because of this, only a fraction of the kitchen was mopped, with the rest remaining dirty.
Yet, when the wipe did stay on, it picked up a decent amount of debris, but the vacuum didn’t indicate when it should be changed. This means you’ll have to check to see if the wipe needs to be replaced periodically. Fortunately, the robot vacuum will pick up where it left off after you change the wipe.
After mopping the area, you can discard the wipe, remove the moping pad plate, and place it back inside the charging base lid. Afterward, the robot vacuum will automatically switch back to Vacuum Mode and return to its base.
Looking at the aftermath of the areas mopped, the K10+ did a decent job, but the floor wasn’t as shiny as if we had cleaned it with a traditional mop. The wipes provided are similar to disinfectant wipes, so we didn’t expect outstanding results when we first put them on.
SwitchBot Mini Robot Vacuum K10+ review: Charging method when clean
When the SwitchBot K10+ returns to the Station, it will verbally confirm that it has begun charging. You can also see the vacuum’s charging status in the SwitchBot app.
From our tests, charging was relatively quick, and when the K10+ was fully charged, it would automatically go into sleep mode. This will preserve the battery and prevent it from overcharging.
But although charging was fast, we experienced the K10+ having to recharge itself before it finished vacuuming our whole house. The house has five rooms, but after cleaning four, the battery level hit 20%, and the robot vacuum paused what it was doing and went to recharge.
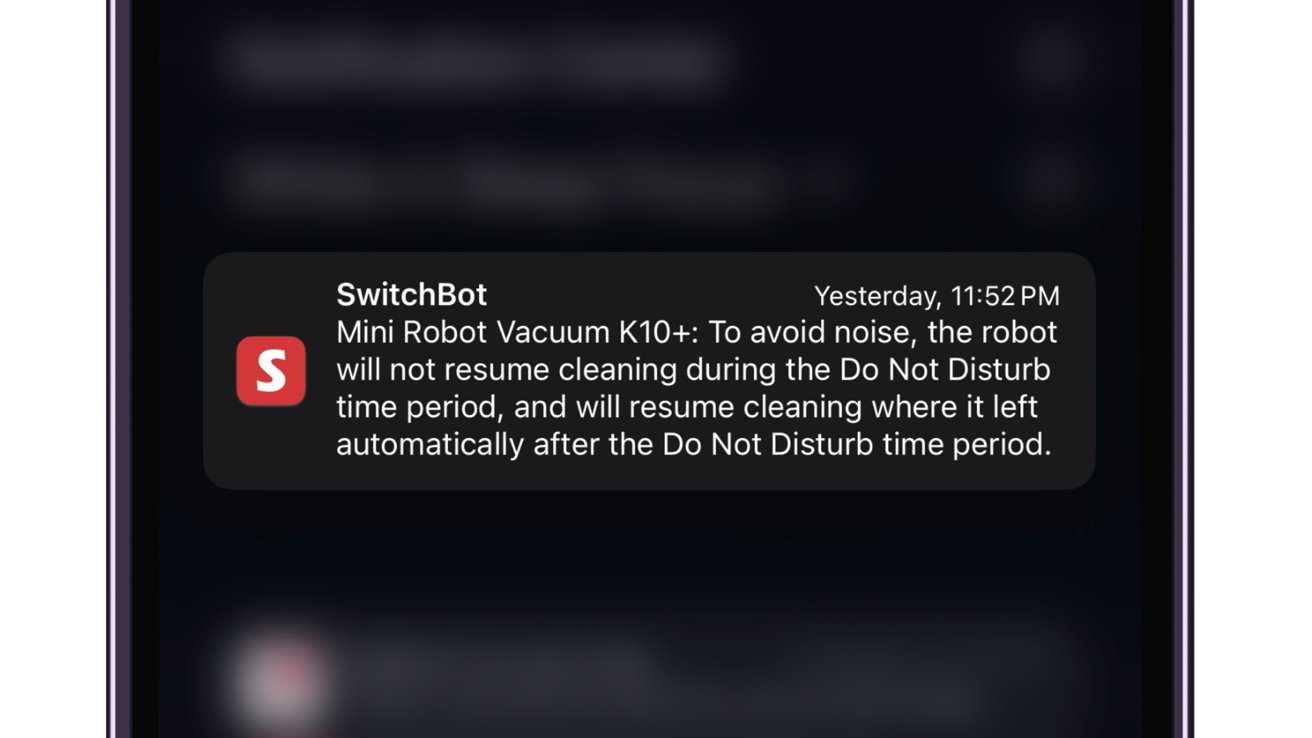
After the K10+ returned to its base, we were notified that it would resume where it had left off once fully charged. But if it finished charging at a time when you programmed it not to clean, it wouldn’t continue until the period was over.
This was great to know because it eliminated the fear of the K10+ starting to vacuum in the middle of the night. However, you’ll need to preset these times to ensure it won’t begin to clean during them.
SwitchBot Mini Robot Vacuum K10+ review: Notification stating that cleaning will happen after Do Not Disturb period
In the case of the K10+ being accidentally pushed from the Station when it’s charging, it’ll automatically reposition itself back to where it was before. This came in use when we accidentally kicked it when reaching for something on the kitchen table.
Additionally, repositioning itself assured us that if it were unintentionally moved without our knowledge, it would automatically reposition itself to charge.
Yet, on the other hand, we did run into trouble when having the K10+ try to self-dock on carpeted surfaces. It would continue to move away from the Station and try again until it gave up.
We initially wanted to place it in the living room where there’s more space, but since there were issues with the carpeting, we chose to put it in the kitchen. This issue limits the customization and freedom we had to place the vacuum where we see fit, and since it can clean carpets, we didn’t expect a docking issue.
While you can manually place the K10+ on the charger, we found it cumbersome after each cleaning cycle. Robot vacuums are supposed to be able to operate themselves mainly, and not being able to dock itself took some of that notion away.
SwitchBot Mini Robot Vacuum K10+ review: The main controls in the native app
The SwitchBot K10+ must be set up within its native app before you can use it. Once set up, you can access all the additional features unavailable through the physical buttons.
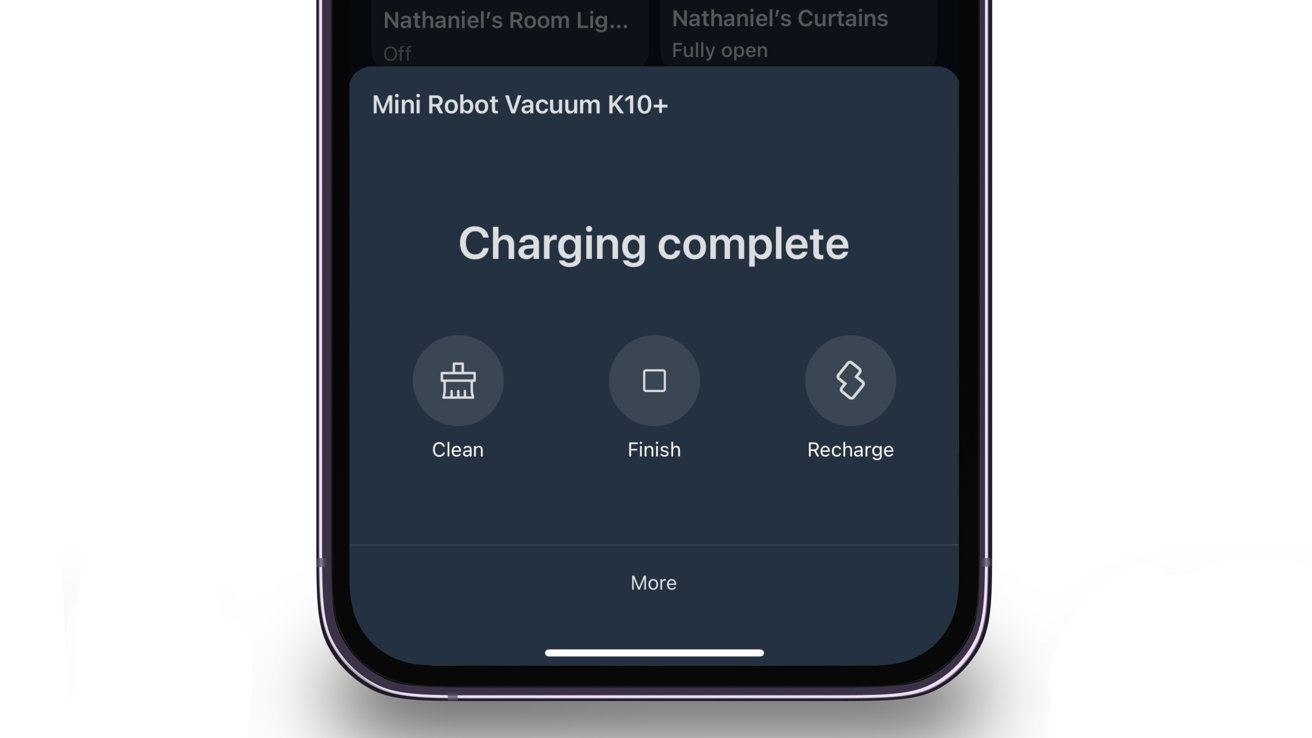
When tapping on the vacuum from the home page, you can have it start cleaning, finish cleaning, or return to the Station to recharge. But tapping “More” at the bottom will lead to additional K10+ controls.
For what you essentially use the K10+ for, having these commands easily accessible will make directing the robot vacuum more efficient. Since they’re right there, you won’t have to fumble through multiple settings to find them.
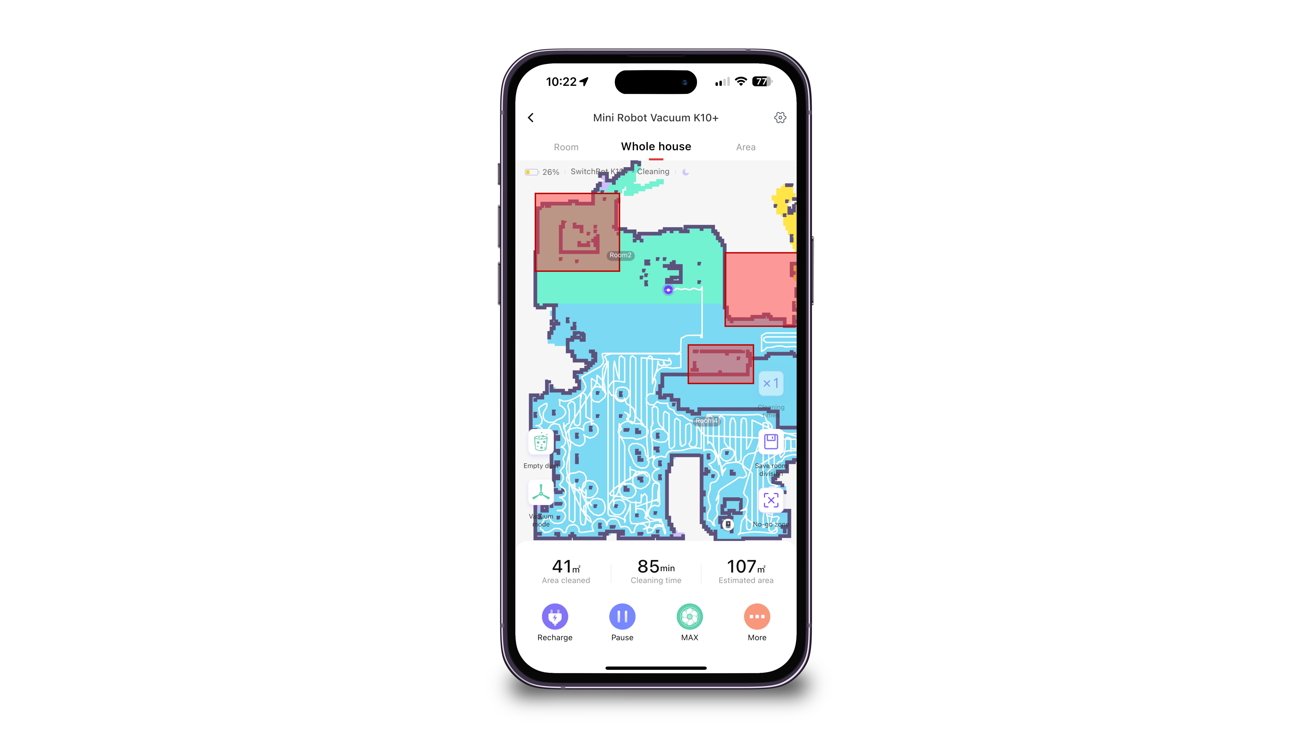
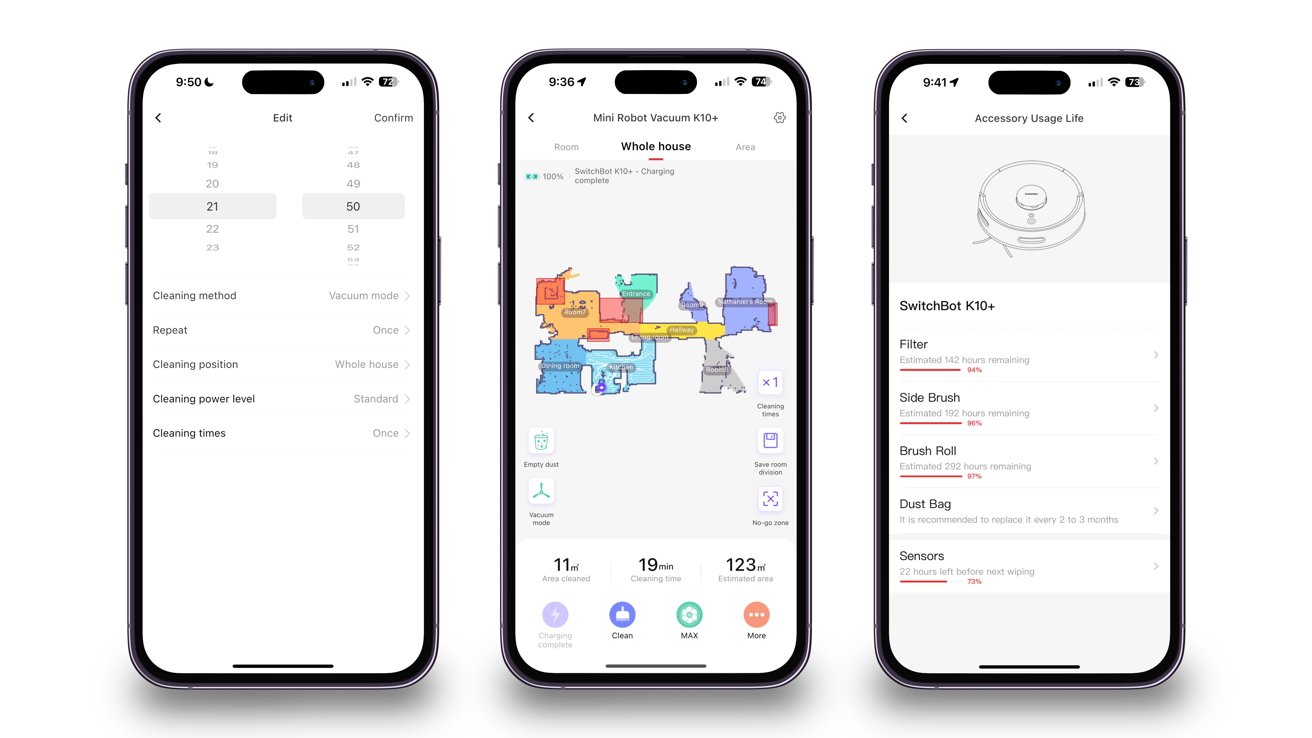
In the center of the screen is your house’s mapped-out floor plan. A number will label each room, but those can be easily renamed in the Rooms category of the app.
On the top are three categories: Room, Whole House, and Area. Tapping into one allows you to command the K10+ to clean specific areas within each section.
This became one of our favorite features because it allowed us to choose which room(s) to clean when preparing for the day. We would repeatedly have the K10+ vacuum the dining room before eating dinner or prepare the living room before we all went in to relax.
Having a clean room to walk into always feels nice, and the K10+ helps achieve that by cleaning specific rooms in specific orders while you’re performing other tasks.
If a mess occurs, but you don’t want the K10+ to vacuum the whole room, you can select an area to clean, and the robot vacuum will only clean there. This is only doable within the Area section of the app.
Near the bottom left of the screen are controls to manually empty the dust bin and to change the cleaning mode. However, you’ll need to install the mopping pad plate before you switch to Mopping Mode.
SwitchBot Mini Robot Vacuum K10+ review: Native app to set cleaning schedule, map layout, and check usage life of various parts
Close to the bottom right are controls to decide how many rounds you want the vacuum to clean and a save button if you choose to divide the rooms differently than before.
Underneath these buttons is an option to set no-go zones, which prevent the K10+ from cleaning specific areas you block off. These can be positioned anywhere in your house, except where the Station is, and will take effect immediately when placed, even if the vacuum is currently cleaning.
While we’d set these zones before cleaning, it was good to know the changes would go into effect immediately if we saw a vulnerable area when it was cleaning.
We set these by our pet’s food bowl — since the K10+ consistently moved it when cleaning — and our lounge chair because it repeatedly got stuck in the wires beside it. The K10+ adhered to these zones, and we had no issues with it disobeying them when cleaning.
Moreover, they are beneficial when setting specific zones for mopping. To eliminate going over carpeting, we set no-go zones on both ends of the kitchen, and since these are only for mopping, they didn’t affect the K10+ when vacuuming.
At the bottom of the screen is a setting to change the intensity of the vacuum’s suction. You can set it to quiet, standard, strong, or MAX. Different strengths will cause different levels of noise.
Tapping on the three dots in the lower right will show additional options. You can get a report on the usage life of various accessories and a cleaning report of when the K10+ was last active.
There are also other options to edit the map layout and set schedules for when you want the robot vacuum to clean automatically. It was nice to wake up to a vacuumed hallway every morning without worrying about stepping on any cat litter that had fallen from our cat’s paws.
Furthermore, we set the robot vacuum to start cleaning our living room at 4 p.m., and when the time came, it started up and went to cleaning. We enabled it to run on weekdays only, but if we wanted to change the frequency, we could easily do so.
If the K10+ is stuck, you can control it manually from your device by activating RC Mode. However, you can only move it forward, not backward, and it doesn’t vacuum when controlling it.
This was disappointing since it would’ve been helpful to have the option to clean any missed areas manually. There is a clean option under the controls, but it’ll only instruct the robot vacuum to clean the whole house instead of enabling the feature when manually controlling it.
Going into the settings of the K10+ will let you change the underlying features of it. This consists of adjusting the voice’s sound volume, activating the child lock, and setting how often you want the vacuum to return to the Station to empty itself automatically.
Additionally, you can set multiple periods throughout the day for the K10+ to not disturb you. During these periods, the robot vacuum will not clean, say anything, or empty itself.
We have a health aid that comes in every weekday, so we set the K10+ not to clean when they’re here so it doesn’t get in their way. This ensured no conflict between the health aid’s work and the robot vacuum’s cleaning.
SwitchBot Mini Robot Vacuum K10+ review: Connecting to the Apple ecosystem
The SwitchBot Mini Robot Vacuum K10+ is currently not compatible with HomeKit or Matter but does work with Siri Shortcuts. But when Matter support does arrive, we recommend not deleting the native app since most of the vacuum’s best features will still be located in it.
Siri Shortcuts
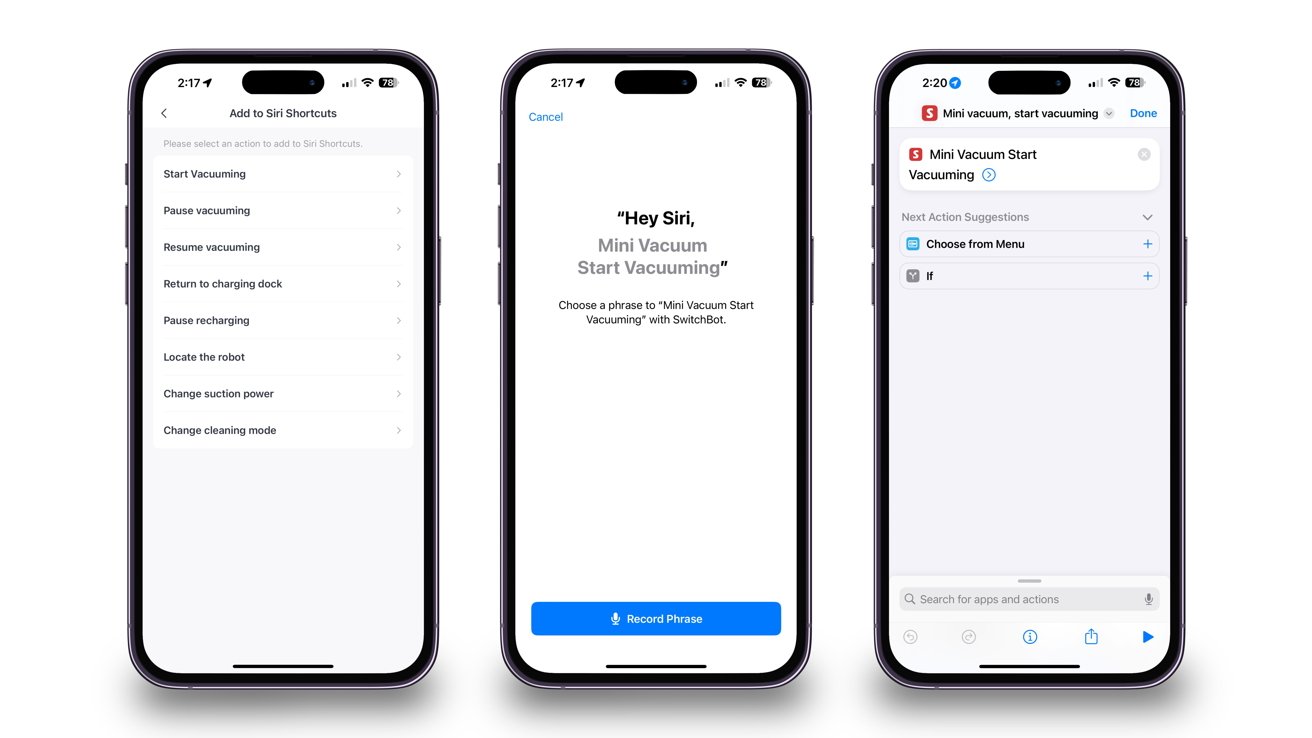
Within the settings of the K10+, you can select preset shortcuts to be added to Siri. These can consist of programming the actions of the vacuum, locating it, or changing the suction or cleaning power.
However, you cannot set a shortcut to clean a specific room; it’ll only be for cleaning your whole house. We found ourselves having the robot vacuum clean individual spaces more than the entire house, so not being able to set a shortcut to a room was disappointing.
Setting up a shortcut is the same process as you would do before, but it must be created within the SwitchBot app since the actions are not available in the Siri Shortcuts app.
When the shortcut exports over to the Shortcuts app, you can either keep it as is or add additional steps to happen once it’s activated.
Like other shortcuts, you can activate it by either saying the recorded phrase to Siri or manually selecting it within the app. Once activated, the SwitchBot mascot will appear in a notification confirming that the vacuum received the command.
We experienced no delay when activating the robot vacuum through Siri Shortcuts, and the K10+ responded promptly to the instructions while additionally changing tasks when commanded.
Also, since Siri Shortcuts work through HomePods — which we have in every room — we could command the K10+ through them if we saw a room that needed cleaning. This accessibility allowed us to direct the robot vacuum even if we didn’t have our iPhone on us.
However, since Siri Shortcuts doesn’t currently offer the essential features the native app has, we typically instructed the K10+ through the SwitchBot app rather than the Shortcuts app.
Matter support
Once Matter 1.2 is released, smart vacuums will be compatible with Matter-supported ecosystems. SwitchBot is one of the companies that will jump directly on board with the K10+.
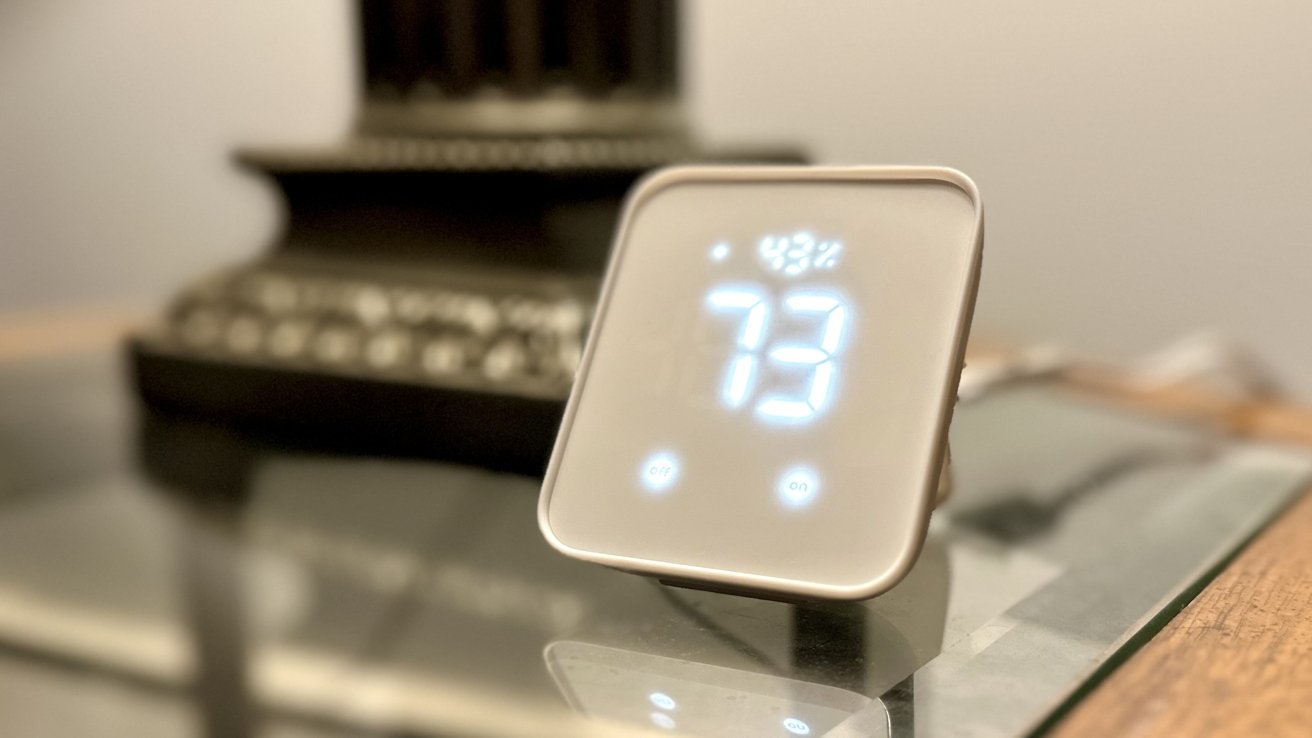
SwitchBot has already adopted Matter support into their existing devices through the Hub 2, and the K10+ will be no different. Once available, you can bridge the vacuum to the Home app like with other compatible SwitchBot devices.
We are told the technical plan for the integration will be to have an on-and-off switch – like how switches already have in the Home app — for mapping. There will also be an option for cleaning and recharging.
However, no specific timeline has been determined for Matter implementation, and layouts could change when Matter 1.2 is released. But regardless of when it’s released, you’ll need a Hub 2 to access HomeKit compatibility.
SwitchBot Mini Robot Vacuum K10+ review: Your vacuuming companion, with some setbacks
The SwitchBot K10+ is a great cleaning companion when you want your home vacuumed but don’t want to do it yourself. However, while it cleaned carpeted areas well, the K10+ is more suitable for smaller spaces with tiled or wooden flooring that doesn’t need to be mopped.
With its small design, the K10+ could get under furniture and into tight spaces comfortably. Although it did bump into objects most times, the bumper kept it safe and pushed it back on track when it happened.
SwitchBot Mini Robot Vacuum K10+ review: K10+ waiting for its next cleaning task while stationed at its base
Furthermore, having the robot vacuum be able to vacuum one or multiple rooms — in a specific order — while we did other tasks was very beneficial. This meant we could focus on dusting or doing laundry while the K10+ swept the debris off the floors.
On the other hand, even though the K10+ is currently promoted to help with mopping your house, it didn’t do an excellent job. The recurring issue of the wipe randomly detaching caused most of the room to remain dirty and forced us to use more wipes than needed.
In addition, the issue with docking itself on carpet shuns out people whose house is mainly built with it — like ours. If the vacuum can clean carpeting, then it should be able to dock itself with no issues on the same flooring.
Overall, we enjoyed our time with the K10+ because it helped vacuum our floors with little to no hassle. On the flip side, there are a handful of issues SwitchBot must address before this can be categorized as one of the best robot vacuums on the market.
If you live in an apartment or tiny home and want an intelligent robot vacuum that’ll soon be compatible with Matter, then the SwitchBot K10+ is worth checking out. However, if you need a vacuum or mop for heavy-duty cleaning, you may want to look at more traditional options.
SwitchBot Mini Robot Vacuum K10+ review: Pros
- Simple setup and connectivity method
- Quiet cleaning
- Automatically charges itself when the battery is low
- Multiple customization settings for cleaning
SwitchBot Mini Robot Vacuum K10+ review: Cons
- Loud dust collecting
- Unreliable stair detection
- Difficulty docking itself on the carpet
- Wipe randomly detaches when mopping
Rating: 3 out of 5
Where to purchase the SwitchBot Mini Robot Vacuum K10+
You can purchase the SwitchBot K10+ from their website for $499.99, but at the time of this review, you can apply a 20% off code to your order. It is only available in white.
It is also available on Amazon for the same price, with the same promo, and available in the same color.
This story originally appeared on Appleinsider

