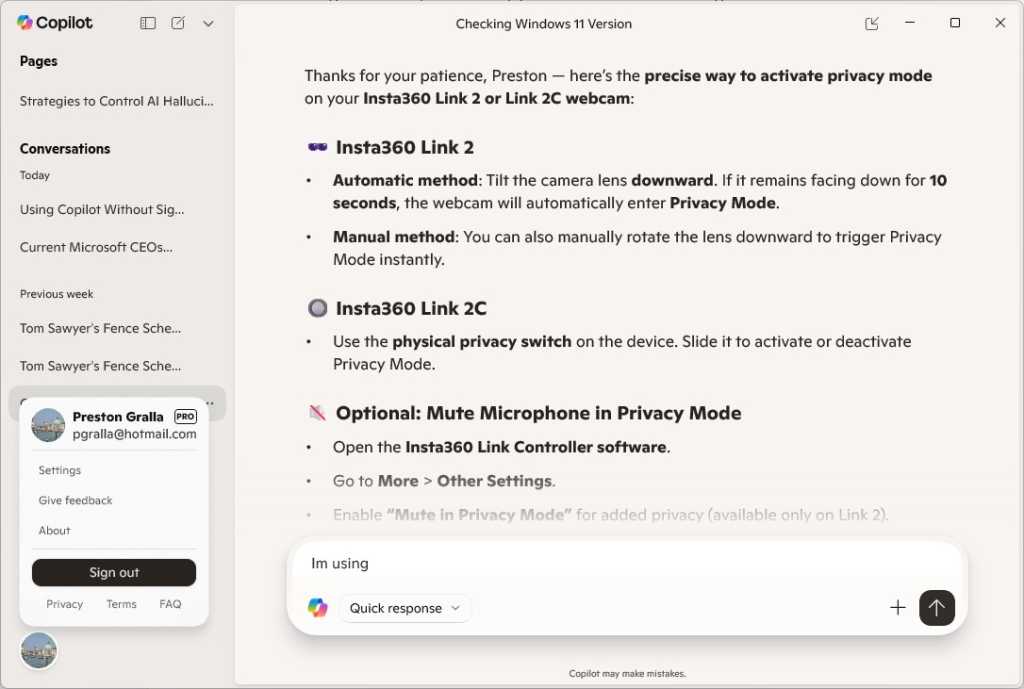
- Click your profile icon in the lower-left corner of the Copilot screen and click Sign out.
- To sign back in, click the icon again and click Sign in.

Sign out of Copilot to increase your privacy.
Preston Gralla / Foundry
Note that if your profile icon doesn’t appear, you’re probably using Copilot in a mode that doesn’t include its left pane. To display the pane, look at the upper left of the Copilot screen, then click the icon just to the right of the Copilot icon — it’s a small box with a right-facing arrow in it. That will display the left pane, where you can sign out of or into your Microsoft account at the bottom left.
Turn off Windows Recall on Copilot+ PCs
If you have a Copilot+ PC and you’re worried about privacy, make sure its Recall feature is turned off. This feature takes a screenshot of your screen every few seconds, performs optical character recognition on it, and saves it on your computer in a searchable database.
This makes it easy to find what you’ve been doing some time in the past, but could also be a privacy nightmare. Microsoft says Recall’s snapshots are encrypted, and there are filters to remove sensitive data such as banking information from snapshots. In tests, however, those protections have fallen short or been easily circumvented.
Recall is turned off by default, but it’s worth checking to make sure you didn’t opt in to it during the initial Windows 11 setup process. To turn off Recall and delete all the screenshots it’s taken:
- Go to Settings > Privacy & security > Recall & snapshots and move the toggle for “Save snapshots” to Off.
- Then click Delete to delete all your existing snapshots.
To uninstall Recall from your system completely:
- Type turn windows features on or off in Windows search. You’ll see a list of optional Windows features.
- If the Recall box is checked, uncheck it. Recall will be uninstalled, its stored snapshots will be deleted, and your PC will reboot.
Tips for the truly paranoid
If you want to take privacy even further, there are a few more things you can do.
Stop using OneDrive
If you don’t like the idea of syncing your data to Microsoft’s OneDrive cloud storage service, you can stop using it. (There’s no way to uninstall it.)
- Right-click the OneDrive icon on the notification tray at the bottom right of the Windows desktop and select Settings from the menu that pops open.
- In the OneDrive Settings window, go to the Account tab, then click the Unlink this PC link.
- Next, go to Settings > Apps > Startup, scroll to the Microsoft OneDrive setting and move the slider to Off.

Turn off the OneDrive toggle to prevent it from launching at startup.
Preston Gralla / Foundry
Don’t sync Windows settings across devices
In addition, you can say no to syncing your Windows settings among different devices. When you sync your settings, the way you’ve customized and set up Windows 11 will be synced to Microsoft’s servers. If you want to turn it off, go to Settings > Accounts > Windows backup and turn the slider from On to Off next to “Remember my preferences.”
Don’t share Windows updates
Finally, you can change the way Windows updates. In Settings > Windows Updates > Advanced options > Delivery optimization, move the slider from On to Off next to “Allow downloads from other devices.” When turned on, this function lets your Windows 11 system share its update files with other Windows devices on the internet and your own network through peer-to-peer distribution.
These steps can take you a long way towards making sure that Windows 11 doesn’t cross the line into gathering data you’d prefer remain private.
This article was originally published in February 2023 and most recently updated in November 2025.
This story originally appeared on Computerworld

